A slideshow is the best way to combine all your memorable photos into one video with amazing effects. Do you have any photos from your student days? Do you go on a trip and want to have all the photos you took there in one place? Are you working on someone’s biography and want to narrate the photos? Slideshows are the answer to all these questions.
Slideshows can be easily created on your PC. All you need is a few photos (high quality) and specialized software. Fortunately, there are many free and paid slideshow creation tools on the internet to choose from. However, choosing the best tool according to your needs can be a little difficult.
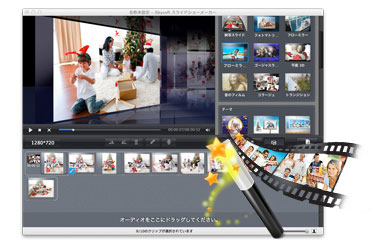
To help you with your decision, we reviewed a completely free-to-use slideshow creation tool called 4K Slideshow Maker . It’s a powerful tool and very easy to use, which is one of the main reasons I reviewed it. So, let’s get started and learn how to create beautiful slideshows using 4K Slideshow Maker.
introduction
4K Slideshow Maker is created by 4K Download , a software company known for its powerful and completely free to use software . As mentioned above, this tool is completely free (no hidden fees) and very easy to use, making it perfect for beginners.
However, it doesn’t offer many customization options, but the built-in customization options are sufficient for many people. This flaw is also one of its strengths, as it allows users (especially beginners) to create great slideshows without having to fiddle with too many settings.
Additionally, it is a very lightweight software (only 31 MB) and comes with a portable version that you can take anywhere and use directly from your USB drive.
Compatibility and installation
According to the 4K download website, 4K Slideshow Maker works with Windows 8, Windows 7, Windows XP, OSX 10.9, OSX 10.8, OSX 10.7, and Ubuntu Linux. However, we also tested the software on Windows 10. The software worked perfectly with the same performance. You can see it in the screenshot below.

Simply download and install 4K Slideshow Maker for your OS of choice from the main download page . It is easy to install and unlike other free software, it does not contain any adware, toolbars or malware.
interface
When you start the program, you will see a very simple interface. To be honest, it may seem a little off-set, with few menus and a grayish interface that isn’t very appealing to many photography enthusiasts. But when we dug a little deeper, we discovered its true strength. The software has a simple interface with minimal menus, so you can focus on what’s important and get your work done in just a few clicks.

You will see quite a number of options there and the entire process of 4K Slideshow Maker depends only on these options. We will explain each of them in an easy-to-understand manner.
1. Add photos

This is easy. If you want to add a photo from your PC, just click on this option. A Windows Open dialog opens where you can select photos for your slideshow.
You can access this option by clicking in the center of the interface, or you can drag and drop images from Windows Explorer in the center of the interface to add them to the program.
2. Change the music
You can use this option to add background music to your slideshow. Just click on it and select the audio file you want to add. This is almost complete. Music/audio will play behind the slideshow.
However, this feature is best suited for music files, as audio files with narration are very difficult to sync with slideshows. This tool does not have a live narration option to add narration audio to your slideshow.
Supported audio formats include .mp3, .wma, .wav, .ogg, .ape, .flac, .aac, and .ac3.

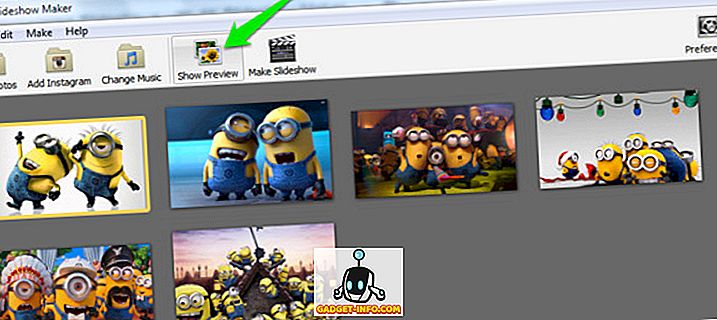
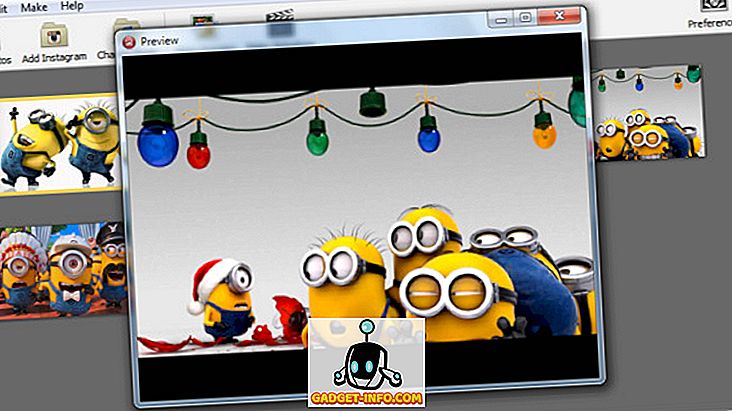
3. Show preview
This option allows you to preview your slideshow in 4K Slideshow Maker’s built-in video player. Very useful to see how your masterpiece will look and make the necessary edits if necessary.
However, don’t trust the preview when it comes to quality. This is just a quick video of how things look, not how “better” they look. The image may be a little blurry here, but it will look much better once the original slideshow is created.
4. Create a slideshow
As the name suggests, this option creates the final slideshow according to your customized options. However, it is best to customize all settings (described in the next heading) before pressing this button, although you will also be given the option to customize video and output settings.

5. Settings
This is the backhand of 4K Slideshow Maker and includes all the options you can adjust to customize the slideshow you’re about to create. There are many options to adjust, and we will explain them all.

Photo duration: You can choose how long a photo is displayed before changing to the next photo. The units are seconds, and you can specify any number of seconds in the empty text box at the end, or use the slider with a maximum limit of 10 seconds.
Transition duration: A transition is a fading effect that occurs when an image changes. This option allows you to specify transition times up to 2.5 seconds. However, this tool does not have the ability to change the style of transitions.
Make slideshow length equal to audio length : This option automatically adjusts the Photo Length to match the audio files you add.
Apply Ken Burns Effect: Apply the famous Ken Burns effect to images in your video . This will zoom out the image as you move from right to left or from center to back, giving you a bit of a 3D effect. Unfortunately, this is the only style you can specify for your slideshow in 4K Slideshow Maker.
Use face detection technology : Automatically detect faces in specific photos.
Video format: You can choose the output video format according to the device name, such as Windows, Mac OSX, iPhone, YouTube, etc.
Video aspect: You can change the video aspect ratio (width and height). You can use 16:9 or 4:3 aspect ratios.
Video Quality: Change the video quality using low, medium, and high options. The higher the quality, the larger the slideshow size.
Output folder: Select a folder to save the slideshow.
Slideshow name: Give your slideshow a unique name. The default name is “My Slideshow.”
Just tweak these settings as needed to create the perfect slideshow.
Customize images and create slideshows
You can arrange the photo sequence and rotate the photos you want directly from the main interface. Create a sequence by simply adding photos from your PC or Instagram, grabbing them and moving them to where you want them to appear.
Click the upside-down arrow in the bottom right corner of each image to see more options. Options allow you to rotate, add, and delete photos.

Considering that you have already customized all the options mentioned in the review, click “Create Slideshow” and then “Continue” to start the process. Creating a slideshow may take several minutes. You will be able to see all the photos added to the video.
In our case, it took about 13 minutes to create the slideshow. The conditions are: 6 photos with a total size of 4.4 MB, photo playback time 10 seconds, transition playback time 1.5 seconds, all checkboxes checked, video format: Windows, video aspect: 16:9, video quality: High. The resulting slideshow was 17.4 MB.
Using the example above, you can estimate how long it will take to create a slideshow.

See also: 10 best diagramming software
conclusion
4K Slideshow Maker is a great tool that is free and easy to use. However, it doesn’t have many customization options such as effects, styles, and audio narration, but it’s great for simple, high-quality slideshows. It offers everything for the average user, especially beginners, but some advanced users may not be satisfied.


![How to set up a Raspberry Pi web server in 2021 [Guide]](https://i0.wp.com/pcmanabu.com/wp-content/uploads/2019/10/web-server-02-309x198.png?w=1200&resize=1200,0&ssl=1)

")


 in Roblox")
")


")


")


")
