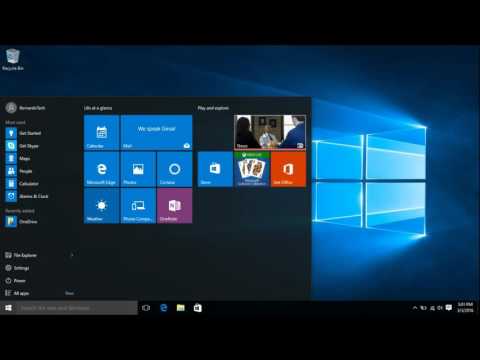
When you log into your Windows PC, the first thing you see is the desktop. If you use your PC a lot, you’re likely spending a lot of time on your desktop, and if your Windows desktop isn’t customized to your liking, your experience will definitely be affected. Thankfully, with each new version of Windows, Microsoft has given users more control over how to customize their desktop to their liking. Windows 10 gives you complete control over the appearance and functionality of your desktop. There are several new and improved features for controlling your interaction with your Windows desktop, as well as new virtual desktop features. To help you customize your Windows 10 desktop, we’ve listed 12 useful tweaks you’ll love.
1. Add or remove system desktop icons
System icons such as Recycle Bin, This PC, and User Files cannot be removed or added in the normal way. Many people may not want these shortcuts to appear on their desktop, or may want to add all system icons to their desktop for quick access. If you’re one of those people, you can add or remove system icons by right-clicking your desktop and selecting ” Personalize .”

Then go to the Themes section and click on Desktop Icon Settings .
A dialog opens where you can turn on or off system icons placed on your desktop.

2. Change the Windows logon sound
Typically, the first thing you hear when you log into your system is the Windows logon sound. If you find the default sounds annoying or bland and want to listen to something different, there’s a way. You can also use another Windows built-in sound or your own custom sound file, but this requires a simple edit to the Windows registry.
Note : Always back up your PC before editing the registry. Incorrect entries in the registry can damage your system. Creating a backup will help you avoid such situations. However, if you follow the steps below exactly, you should be fine.
Press Windows + R to open the Run dialog, type regedit and press Enter to open the registry.
Now go to the following location:
HKEY_CURRENT_USER/AppEvents/EventLabels/WindowsLogon
Click on the ” WindowsLogon ” entry and double-click on ” ExcludeFromCPL ” in the right panel. The value will be set to “1”, so change it to “0” .

This hack adds a new entry for the Windows logon sound to the original Windows Sounds options. To access this new entry, go to Settings -> Personalization and click Advanced Sound Settings in the Themes section.
Now, scroll down until you see the “Windows Logon ” option under “ Program Events ” and click on it to select it. Then use the drop-down menu below to select a built-in sound , or use the Browse option to select your own custom sound . If you choose a custom sound, make sure the file size is small and the length isn’t too long (preferably less than 20 seconds).

3. Remove Cortana search bar
Cortana displays a giant search bar on your taskbar, allowing you to quickly search your system and use other features of your virtual assistant. However, you don’t need to always have a large search bar on your taskbar. To remove the search bar, right-click the taskbar and hover over the Search option. A side menu will open, where you can click ” Show search icon ” to remove the search bar and add a search icon.

4. Automatically hide the taskbar
It’s an old feature, but it’s really useful. You can set the taskbar to automatically hide when it doesn’t have focus and reappear as soon as you move your mouse cursor over it. This will give you a clutter-free desktop with more space and give you access to the taskbar if you need it.
To enable this, right-click the taskbar and select Properties from the menu.
In the properties, check the box next to ” Automatically hide the taskbar .”
5. Pin items to the taskbar
The taskbar has a huge area that you can use to add shortcuts to programs for quick access from anywhere. Simply drag and drop any program’s icon from anywhere to the taskbar to pin it to the taskbar. You can also pin it to the taskbar by right-clicking the item and selecting Pin to Taskbar (if available).

You can also unpin an icon by right-clicking it and selecting ” Unpin this program from the taskbar .”
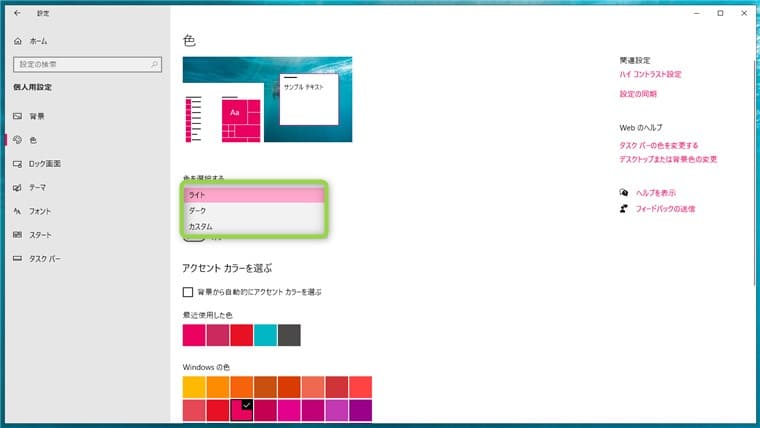
6. Change taskbar and menu colors
If you’re customizing your desktop, you’ll probably want to color your taskbar and menus to your liking. If you go to Settings -> Personalization -> Colors , you will see two options to change the colors. You can let Windows choose a color automatically based on your Windows 10 background, or you can simply choose a color from a list. Windows has a large list of colors to choose from, but I couldn’t find a spectrum option to choose exactly the color I wanted.
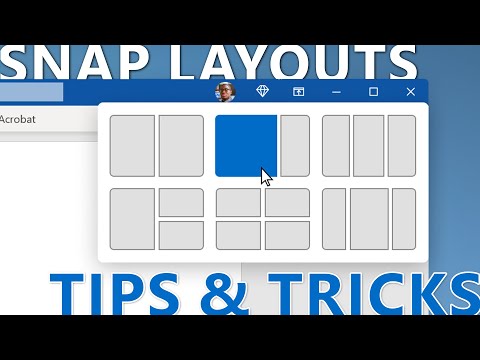
7. Snap window
You can also snap windows to the corners of the screen to view multiple windows at the same time and work between them, making it ideal for multitasking. Windows lets you snap windows automatically or manually drag them to fit them where you want them.
To do it manually, click and hold the top bar of the window in question and move it to the top left or far right corner of the screen . An outline will appear confirming that you can snap the window to a shorter version. When you release the click, it will snap to that position.

You can repeat this process to snap multiple windows, up to four or more windows (depending on your display) that can be easily viewed and manipulated. This is especially useful if you have a large display.

To do this automatically, open all the windows you want to snap (click on the window to open it from the taskbar). Then, right-click on the taskbar and select the desired snapping method, such as stack, side-by-side, or cascade . However, you may not get the desired result every time and may need to make adjustments yourself.

8. Use task view
Task View has been around since Windows 7, but it’s been added back to Windows 10 with an even better interface. Task View lets you quickly see all the open windows on your PC in a grid-like manner and easily navigate them. To access Task View, press Windows + Tab or click the Task View button on the taskbar.
All open windows will be displayed. You can access it by clicking on the window, or close it by clicking the × button.
9. Using virtual desktops
This is an old feature in Linux and macOS, but new in Windows 10. Virtual Desktops, as the name suggests, allows you to create an unlimited number of virtual desktops that are independent of each other. You can open separate applications on each desktop and they do not affect each other. For example, you can create virtual desktops for work and everyday use and easily switch between them.
You can create and access virtual desktops from the same Task View window. Access the Task View as above and click the ” New Desktop ” button in the bottom right corner.
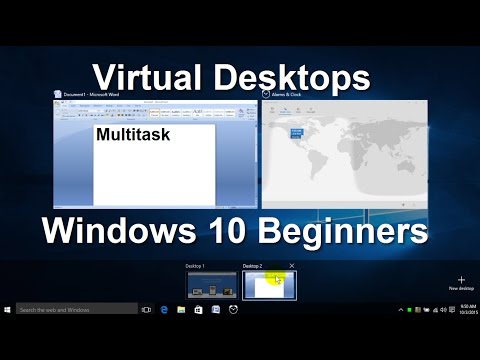
A desktop will be created and you can access it by clicking on it. This virtual desktop behaves as if you’ve just started Windows but haven’t opened any apps yet. You can easily open your favorite apps here and they won’t appear on any other virtual desktop. Task View displays the windows open on a particular virtual desktop with the option to switch to another desktop.
Best of all, you can quickly move applications between desktops by dragging and dropping them from one desktop to another in Task View. If you want to quickly switch between virtual desktops, press Windows + Ctrl and then press the left/right arrow keys to switch.
10. Use the peak function
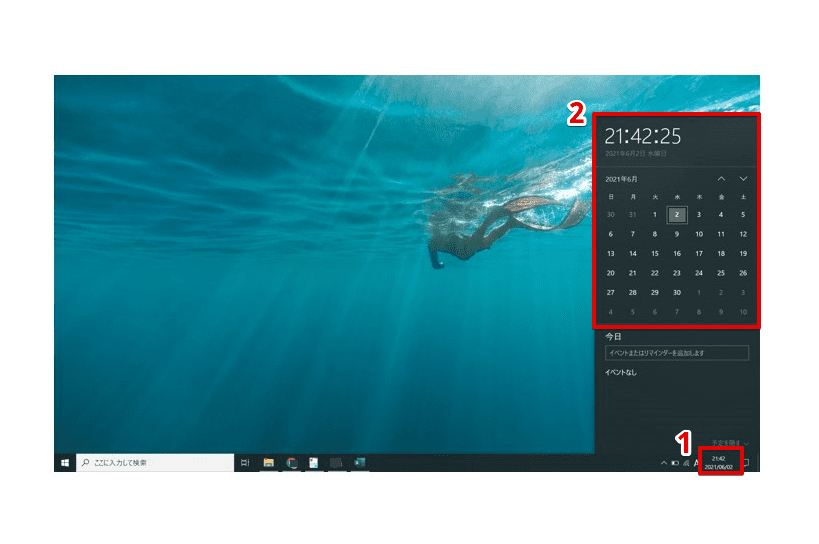
Peek is another great feature in Windows that lets you quickly access your desktop by hiding all active windows, then returning to them again. If you have multiple windows open, it can be a pain to minimize them all to access your desktop. If you use the Peek feature, it will be saved here. The Peek button is located on the far right side of the taskbar (next to the date and time). Just click on it and you’ll see the desktop immediately , click again and all open windows will be restored again.

11. Use Dock applications
Dock applications are basically like the taskbar, adding an extra bar with useful shortcuts and buttons that you can quickly access when you need them. But it’s more interactive. There are many dock applications for Windows, but RocketDock is one of the most popular. RocketDock is a free tool that lets you add shortcuts and app bars anywhere on your screen by dragging and dropping shortcuts onto any application, file, or folder.

The program itself is very interactive, runs smoothly, and can be customized to your liking. We recommend that you set it to “Auto-hide” so that it does not interfere with your work. The best place is on the right side.
12. Get a desktop gadget
Windows ended support for desktop gadgets in Windows 8 because the Live Tiles feature eliminated the need for them. However, if your desktop gadget disappears in Windows 10 and you want it to appear on your desktop again, there is an app to bring it back. You can get the same Windows 7 gadgets using the Desktop Gadgets sidebar app .
Once you install the app, it will add the same “gadgets” option to your desktop context menu , which you can click to see all your gadgets.
Simply drag the gadget on your desktop and it will be placed on your desktop, and the gadget will provide information in real time as you move the widget.
See also: The best way to customize the Windows 10 Start menu
Some great tips for customizing your Windows 10 desktop
After all, your Windows 10 desktop is your desktop, so be sure to customize it to your liking. The customization options above will give you a cleaner desktop and provide more controls and features. Using Task View and virtual desktops in your daily life takes some practice, but once you get used to them, you’ll be more productive. Additionally, other simple and effective tips can help you better manage and customize your Windows 10 desktop. That’s all for our opinion. If you know of other ways to customize your Windows 10 desktop, please share them in the comments section below.


![How to set up a Raspberry Pi web server in 2021 [Guide]](https://i0.wp.com/pcmanabu.com/wp-content/uploads/2019/10/web-server-02-309x198.png?w=1200&resize=1200,0&ssl=1)

")


 in Roblox")
")


")


")


")
