For data science enthusiasts, Jupyter Notebooks are a great way to start your data science projects.
This guide covers:
- What is Jupyter Notebook?
- Why it’s popular for data science use cases
- Instructions on how to set up Jupyter Notebook on your machine
Let’s get started…
What is Jupyter Notebook?
Jupyter Notebook is an interactive, browser-based platform for scientific computing. It is Project Jupyter ‘s open source flagship product and is widely used in data science.
Useful features of Jupyter Notebook
In addition to providing an interactive coding platform, Jupyter Notebook supports both code cells and text cells. You can use markdown formatting in text cells. So you can use plain text, images, LaTex formulas, and more to describe your project’s workflow.
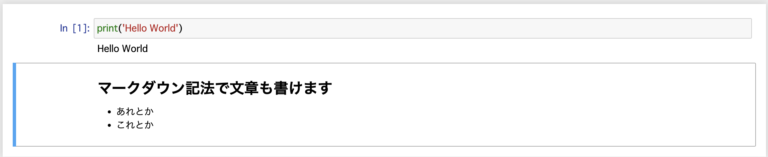
For example, the following image shows how to specify cell types and write both Markdown and code.
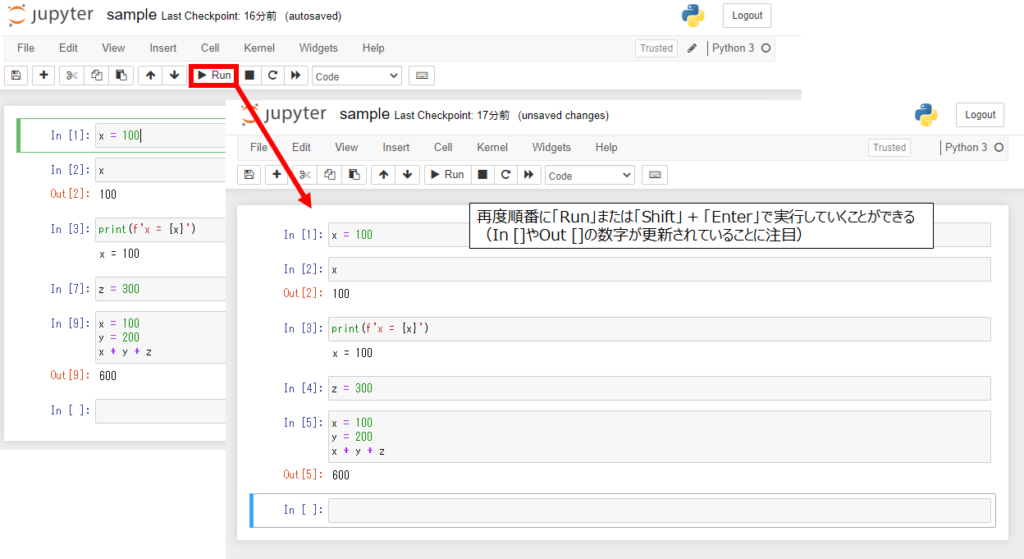
To run the cell, press the Run [▶] button. Alternatively, you can use Shift + Enter to run the cell. The heading and image will be displayed after the cell is executed.
Next, let’s list some other useful features of Jupyter Notebook.
- Support for popular programming languages for data science such as Python, R, Julia, and Scala
- Preparing to share your notebook with other collaborators
- Provisioning big data integration using Spark
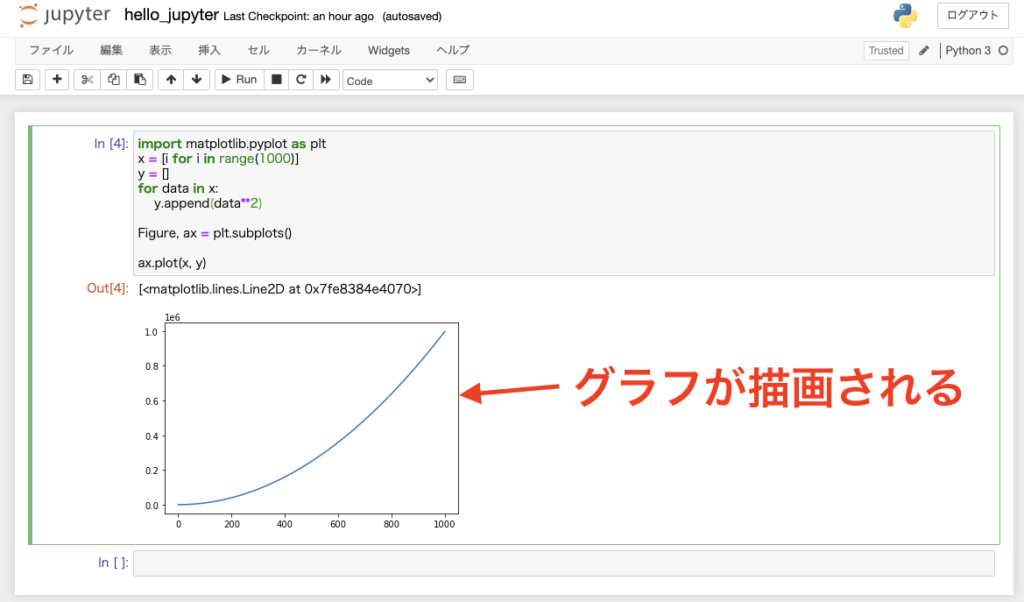
- The following diagram shows the steps in a data science project. From accessing data from the file system on your machine, preprocessing and analyzing data to building machine learning models, you can do it all in Jupyter Notebooks.
Now that you have learned about Jupyter Notebook and its features, let’s see how to install it on your machine. 👩🏽💻
How to install Jupyter Notebook
Installation using Anaconda distribution
If you are a beginner, we recommend using the Anaconda distribution of Python. In addition to Python, several useful data science packages are preinstalled. The installation also includes Jupyter tools such as Jupyter Notebook and JupyterLab.
Now let’s take a look at the steps for this installation.
Step 1 : Visit Anaconda ‘s official website. Then go to anaconda.com/products/individual. Then download the installer for your operating system.
Step 2 : Next, run the installer. Follow the on-screen instructions to complete the installation. Installation typically takes a few minutes. ⏳
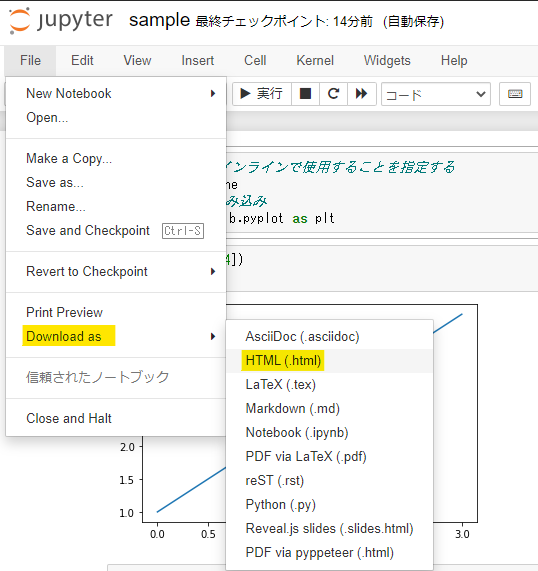
Once the installation process is complete, you can start Jupyter Notebook. And there are several different ways to do it.
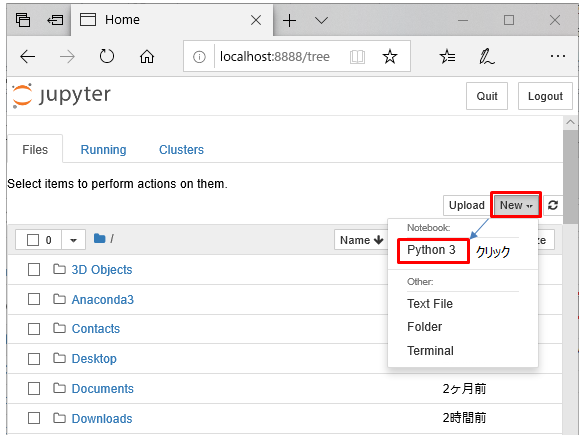
Step 3 : Once the installation is complete, you can launch Anaconda Navigator . From the navigator, click on Launch option on the Jupyter Notebook tab, as shown below.

Alternatively, you can launch it directly using Jupyter Notebook shortcut as shown below.
You can also launch jupyter notebook from the Anaconda command prompt .
Installation using pip package manager
Do you already have Python installed on your system? Want to start using Jupyter without using the Anaconda distribution?
If yes, you can do it using pip package manager. pip allows you to install Python packages that are part of the Python Package Index , a repository of software for the Python developer community.
This section outlines the steps for both Windows and Linux operating systems.
Install Jupyter Notebook using pip on Windows
Let’s start with the Windows installation steps.
Step 1 : Check the version of Python installed on your system by running the following command: You can run commands from Windows Powershell or a command prompt on your machine. Or, if you’re a Git user, you can choose to run in any shell environment, such as Git Bash for Windows.
python --versionNote : Almost all installations of Python3 (Python 3.x) ship with
pippackage manager preinstalled.
Step 2: Next, check the version of pip installed on your machine by running the following command:
pip3 --versionIf you get an error because you don’t have
pipinstalled, upgrade your Python installation. You can download and install the latest release of Python from here .
Step 3 : To avoid dependency issues and ensure all packages are up to date, run the following command:
pip3 install --upgrade pip Step 4 : Now that you have pip installed and updated, use it to install Jupyter using the following command:
pip3 install jupyter 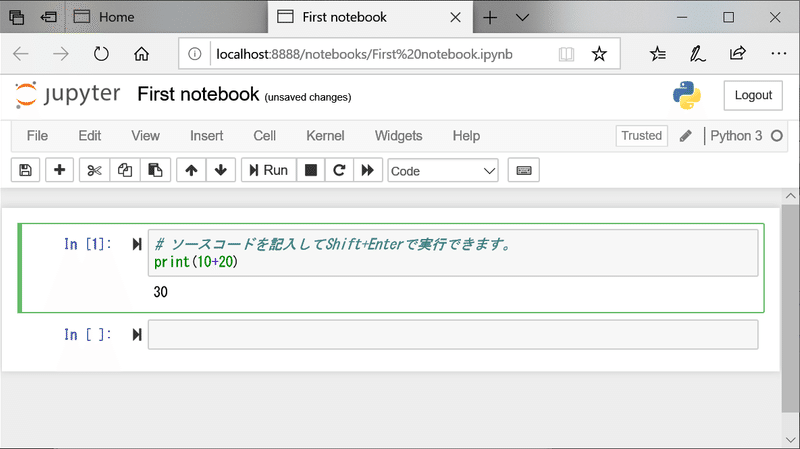
It will take a few minutes for the download and installation to complete. ⏳
Step 5 : To start the Jupyter notebook, run the following command:
jupyter notebookInstall Jupyter Notebook using pip on Ubuntu
All major Linux distributions, including Ubuntu, have Python installed. To install Jupyter Notebook, you must first install it manually using pip . You can then use pip to install Jupyter and other packages.
Step 1 : To install pip , run the following command in your terminal:
apt install python3-pip Step 2 : Then run this command to install jupyter . The installation will take a few minutes to complete.
pip3 install jupyterStep 3 : Next, run the following command to start the Jupyter notebook.
jupyter notebookconclusion
Now you understand what Jupyter Notebook is and the steps to install it on your machine. If you’re interested, check out Project Jupyter’s other products. JupyterLab is built on the classic Jupyter Notebook and provides additional functionality.
If you are starting out in data science, I wish you success in your studies!✨


![How to set up a Raspberry Pi web server in 2021 [Guide]](https://i0.wp.com/pcmanabu.com/wp-content/uploads/2019/10/web-server-02-309x198.png?w=1200&resize=1200,0&ssl=1)

")


 in Roblox")
")


")


")


")
