Steps to enable Google Cloud CDN (Content Delivery Network) on your website.
In my last post, I tested and explained how fast CDN by Google is. I provided a brief explanation of enablement, but many people asked for a more detailed explanation.
introduction
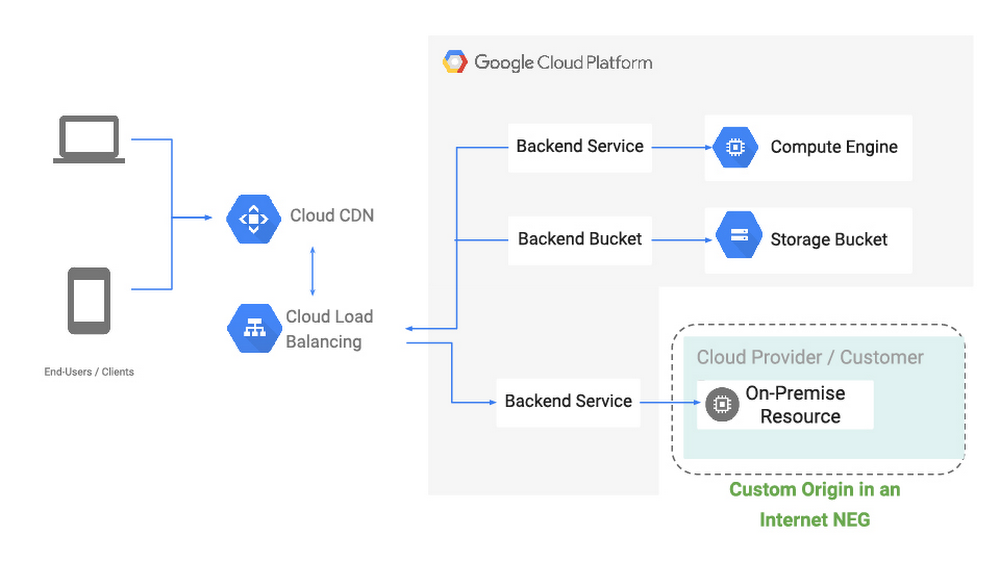
Cloud CDN by Google is a low-latency content delivery solution for small to large businesses.
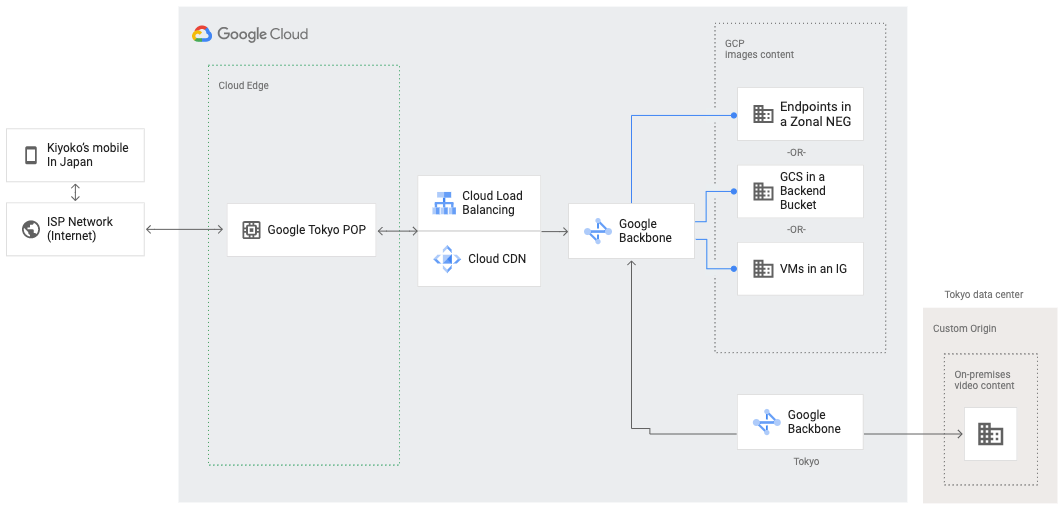
With over 130 Points of Presence (POPs) around the world, we use Google’s global premium network to accelerate content delivery, making us the world’s fastest SSL CDN.
A recent report by CDNPerf shows that Google Cloud CDN outperforms Azure, AKAMAI, Cloudflare, Fastly, and more.
Some of the features of Google Cloud CDN:
- HTTP/2 – Supports the latest HTTP protocols for improved performance
- Low Latency – All content is served worldwide via anycast (single IP).
- Logging – Integrates with Stackdriver and provides detailed logging of requests, cache hits/misses.
- Clear cache instantly
- low cost
Prerequisites
Wondering why it’s a prerequisite?
Google CDN only works with Google load balancers and cloud storage origins. In other words, if your application is not hosted on Google Cloud Platform (GCP), you cannot use a CDN.
That is, external origins are not yet supported. Simple.
So, let’s assume you’re hosting an application on Google Cloud and are ready to use a load balancer (LB) to use a cloud CDN.
You guessed it right. You also cannot use a VM as an origin. Can only be enabled on load balancers.
Shall we start…
scenario
I’m running two VMs (one in Singapore and one in West US). I want to use an HTTP load balancer to load balance requests to both VMs and then activate the CDN.
You need to do the following:
- Create a health check
- Create an instance group
- Create a load balancer
- Enable CDN
Creating a health check
Health checks are essential for the load balancer to determine whether a VM is healthy or not. If a VM cannot respond to queries, the LB marks its state as unhealthy and stops sending traffic.
- Log in to GCP and go to Compute Engine Health Checks .
- Click Create Health Check.
- Follow the wizard and enter the required information.
- Protocol – Select HTTP if the application hosted on the VM listens on port 80, or HTTPS on port 443.
- Request path – working context root.
- Health standards – adjust as necessary
- Click Create
It will take a few seconds. The newly created health check appears in the list. We’ll use this right away.
Creating an instance group
Instance groups are used in load balancing configurations. This is called the LB backend service.
- Navigate to your instance group under Compute Engine.
- Click Create Instance Group.
- Follow the wizard and enter the required information.
- Location – Select a single zone as we will not be using the autoscaling option.
- Zone – Select the zone where your VM is running.
- Group Type – Check Unmanaged Instance Group
- VM Instance – Select your VM from the list.
- Click Create
Repeat the steps to create another VM zone instance group.
You now have two instance groups. Each maps to a VM within its respective zone.
Creating a load balancer
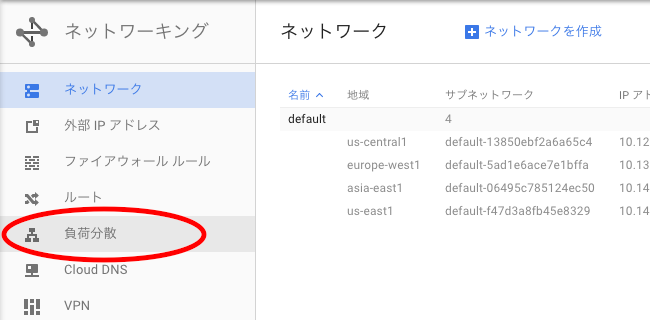
- Go to Load Balancing under Network Services.
- Click Create Load Balancer.
- Select HTTP(S) Load Balancing.
- Please enter the name of LB
- Click Backend Configuration.
- Click Create Backend Service.
- Enter the name of your backend service
- Add both instance groups created earlier as backends
- Select the health check you created earlier
- Session Affinity – Select if session stickiness is required.
- Click Create
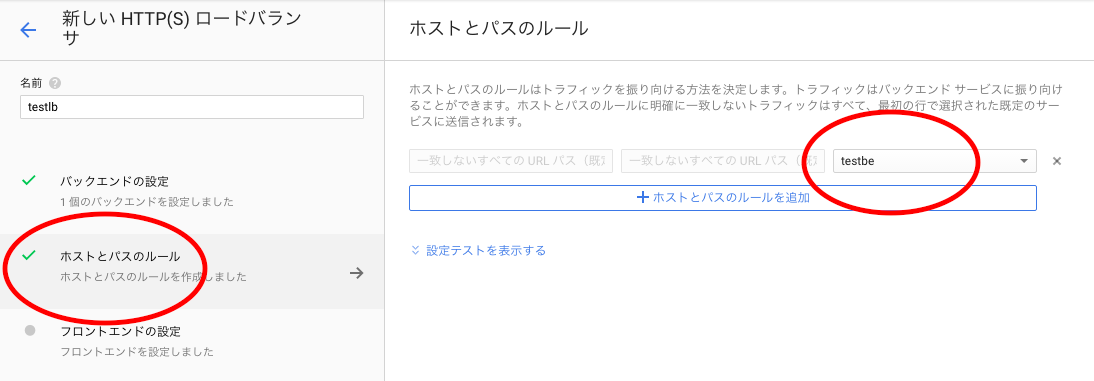
- Leave the default settings for Host and Path Rules. However, if you want conditional transfers, add them as needed.
- Click on Frontend Configuration and enter a name.
- Select Create IP Address to obtain a static IP address. This is important because by default you get a temporary IP.
- Leave the protocol, IP version, and port as default.
- Click “Finish”
- Click Review and Finish, make changes if you feel something is wrong, otherwise click Create.
- Once created, the newly created LB will appear in the list.
This indicates that the LB has been created. Let’s do some tests to make sure LB works.
So I tried to access the LB frontend IP and it was successful .
You can also generate load to ensure that traffic is routed to both VMs. Google forwards requests to the closest VM based on the user’s geolocation.
In my scenario, traffic from Asia is sent to a VM in Singapore, and traffic from America is sent to a VM in West US.
Activate Google Cloud CDN
And finally, enable CDN.
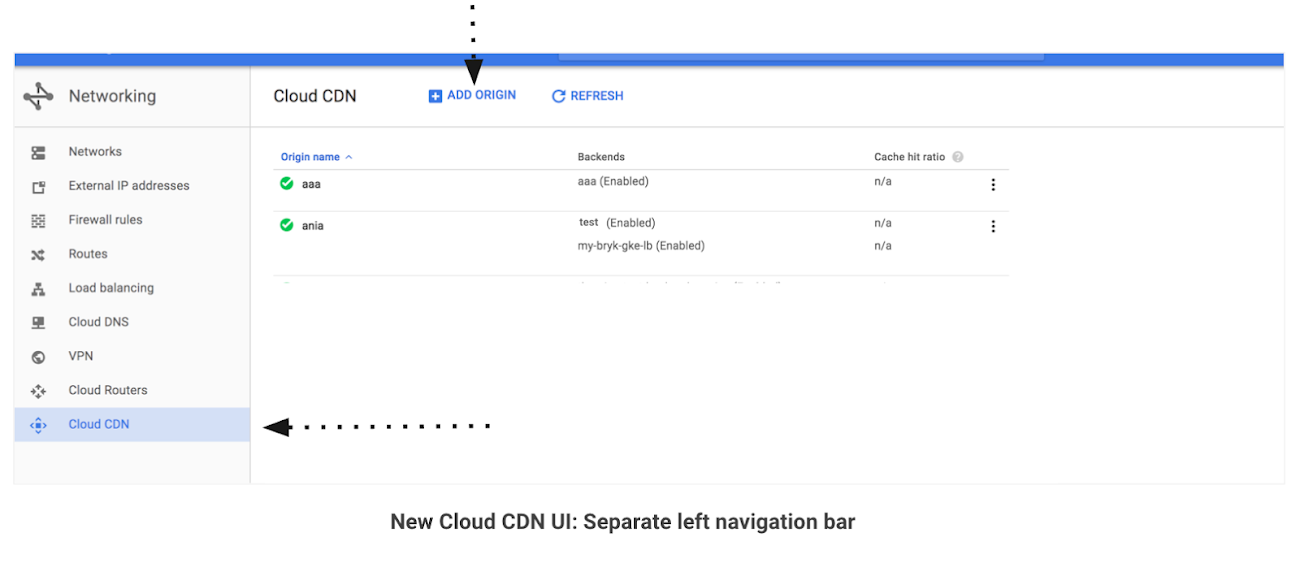
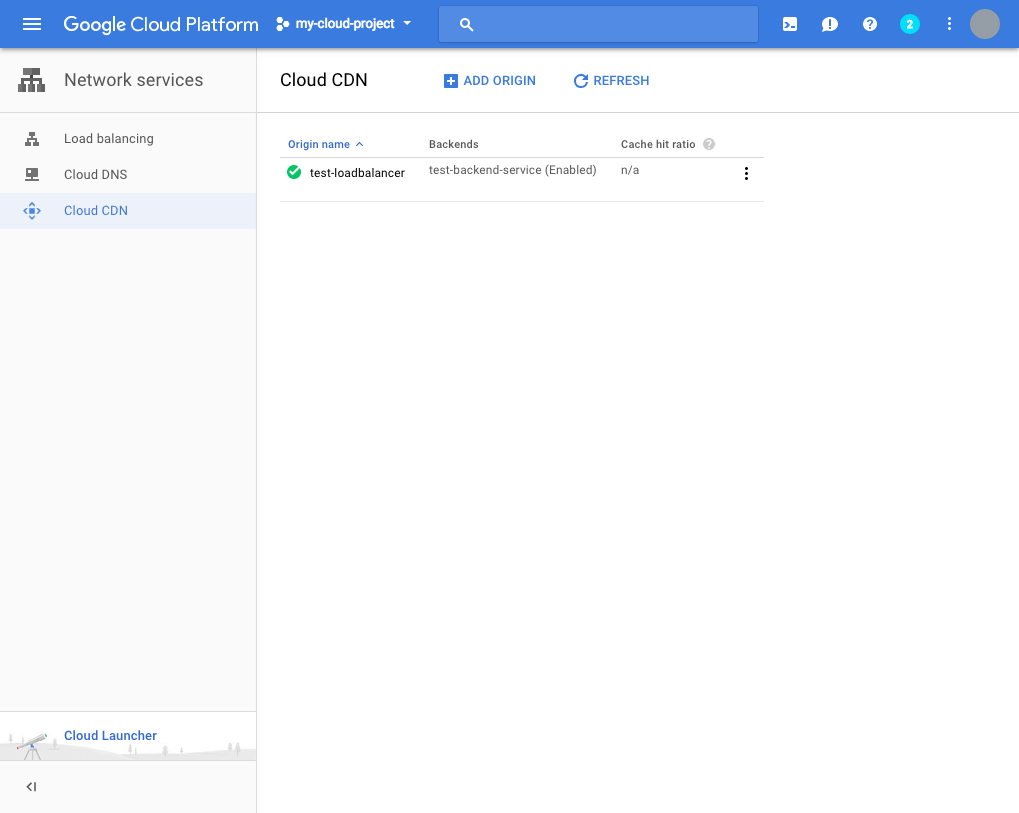
- Navigate to Cloud CDN under Network Services.
- Click Add Origin.
- Select your load balancer from the original dropdown and click Add
- The newly created CDN should appear in the list.
CDN is now enabled on your load balancer.
If you’re happy with it, you can update your domain’s A record to your load balancer’s global IP.
I hope this helps. If you want to learn hands-on about Google Cloud Platform, check out this Cloud Architecture with GCP course.


![How to set up a Raspberry Pi web server in 2021 [Guide]](https://i0.wp.com/pcmanabu.com/wp-content/uploads/2019/10/web-server-02-309x198.png?w=1200&resize=1200,0&ssl=1)

")


 in Roblox")
")


")


")


")
