Let Google Cloud manage your website’s SSL/TLS certificate.
Google recently announced managed certificates that can be provisioned with Google Cloud load balancers. The advantage of using managed certificates is that you don’t have to worry about creating CSRs and having them signed on a regular basis.
And it’s free.
Implementing managed certificates is optional, and you can always secure your site using the commercial certificates described here.
So let’s get started…
I assume you already have a Google Cloud Load Balancer (check out this guide if you need help creating one).
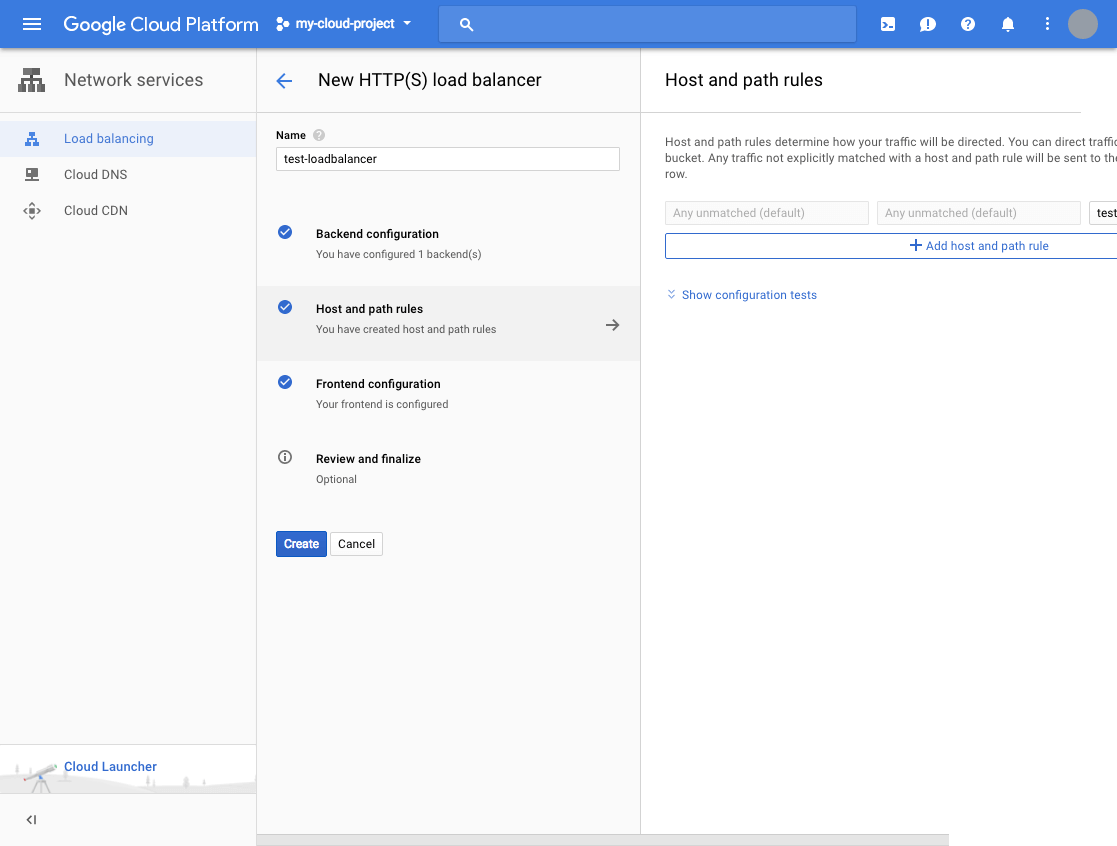
- Log in to Cloud Console and go to Network Services >> Load Balancing.
- Select the LB where you want to implement Google-managed certificates and click Edit.
- Go to the frontend configuration tab and add the frontend IP and port.
- Enter a name and select HTTPS as the protocol (HTTP/2 support is built in)
- Select an existing reserved IP address, or reserve one if you don’t have one.
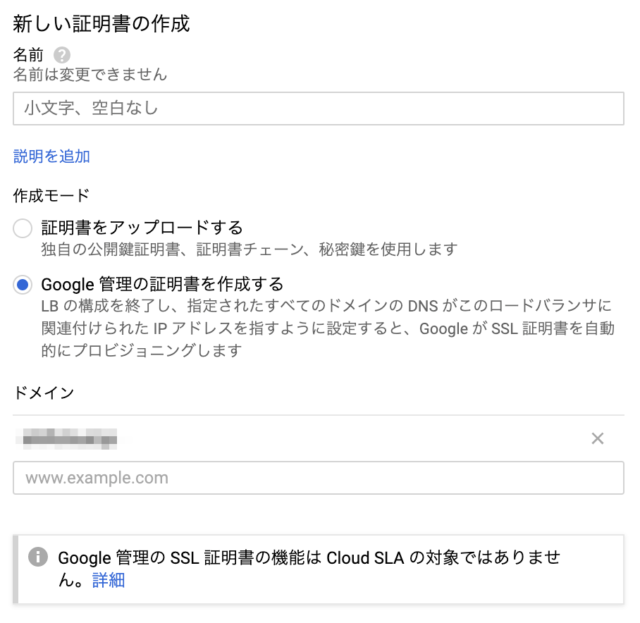
- Create a new certificate in the dropdown
- Another wizard opens; select Google-managed certificate, enter the domain that points to your load balancer IP, and click Create.
- Leave this as the default setting for SSL policy and QUIC negotiation for now.
- Click Finish to update
It will take a few seconds. Another IP will be displayed. The port (443) will be added to the details section along with the certificate.
Wait, it’s not over yet.
Is there a gray exclamation mark in front of the lab certificate?
This means that Google is still provisioning your certificate, which may take several minutes. It should turn green when complete.
Test site over HTTPS
I tried to access my site and an error occurred.
The default GCP SSL policy appears to require customization, which is not good news.
But don’t worry. You can fix it the way I did.
My understanding is that the default GCP SSL policy is configured with a minimum of TLS 1.0, so it should work with browsers that support TLS 1.0 or higher. Is this statement correct?
To get this to work, I had to create a new SSL policy using TLS 1.2.
- Go to Network Security >> SSL Policy >> Create Policy.
- Enter a name and select the version as TLS 1.2, compatible profile
- Add target as load balancer and save
You will see the newly created policy with TLS 1.2 and used by the load balancer.
And finally, you can now get your lab site over HTTPS.
As you can see, the certificate is issued by Let’s Encrypt.
You don’t have to worry about using TLS 1.2. TLS 1.2 is compatible with all modern browsers.
conclusion
It’s much easier to implement Let’s Encrypt certificates using Google-managed options. Within 10 minutes, your site will be secure with a TLS certificate. GCP is impressive. If you’re looking to learn or earn a certification, check out this online course by A Cloud Guru.


![How to set up a Raspberry Pi web server in 2021 [Guide]](https://i0.wp.com/pcmanabu.com/wp-content/uploads/2019/10/web-server-02-309x198.png?w=1200&resize=1200,0&ssl=1)

")


 in Roblox")
")


")


")


")
