Thermal paste, also known as thermal compound or thermal interface material (TIM), is a critical component in the PC building process. Without this, the processor may quickly overheat. To ensure optimal performance, it is important to apply thermal paste to the CPU before installing the CPU cooler. There are many things to consider when applying thermal paste to your CPU. The process of installing thermal paste is simple and easy, and we have explained the different application methods. In this guide, we have provided steps to properly install thermal paste on an AMD or Intel CPU while building a PC or upgrading the CPU.
This guide will explain the correct amount of thermal paste to apply to your CPU. This is a commonly discussed step within the PC building community. That being said, before we install thermal paste on your PC’s CPU, let’s take a look at why it’s important to apply thermal paste first.
Why is thermal paste required between CPU and heatsink?
Thermal paste is an important material that must be present between the CPU cooler and the CPU itself . The CPU cooler has heat pipes on the side that are applied to the surface area of the processor. Both are designed to dissipate heat efficiently. However, without a thermal interface material (TIM) between the cooler and the CPU, heat transfer will not be efficient.
Basically, a CPU cooler’s fan can only effectively cool the processor if a thermal paste is present. Thermal paste is one of the most effective and popular TIMs. It eliminates the incredibly small air gap or space between the CPU cooler and the CPU chip itself . Therefore, applying thermal paste will give your CPU cooler the best cooling efficiency. Without it, the CPU cooler won’t be able to make proper contact with the processor, causing overheating.
What to remember before applying thermal paste
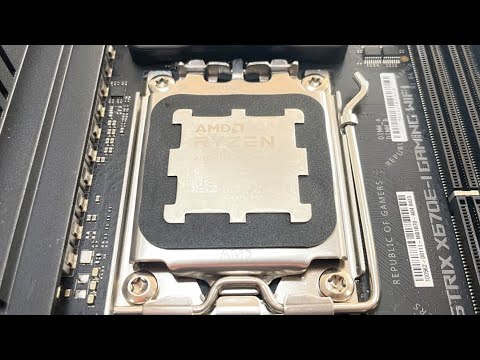
Install the CPU on the motherboard
Before proceeding, you need to ensure that the CPU is installed on the motherboard. If you haven’t done this yet, you should do it now. Before preparing to apply thermal paste to the CPU, please refer to our
Gather the necessary tools
Make sure you have a suitable thermal paste on hand before proceeding. Choosing the wrong thermal paste can result in high temperatures. For recommendations, see our guide to the 15 best thermal pastes you can buy in 2024.
The application process requires two additional things. 1st: 99% isopropyl alcohol solution to clean the surface area of the CPU, 2nd: microfiber cloth. It is important that the surface area of the processor is completely clean and free of residue before applying thermal paste, so we do not recommend taking shortcuts. The last thing you want is to have foreign objects stuck to the surface area of your CPU.
How to apply thermal paste to the CPU
1. First, take a microfiber cloth and pour a small amount of 99% isopropyl alcohol solution onto it. Handle the solution with care. Next, use a microfiber to scrub the surface area of the CPU.
This will completely clean the CPU surface. You should check for any residue, but avoid touching the CPU directly. I cleaned the CPU before installing it on the motherboard, and I recommend doing this step.
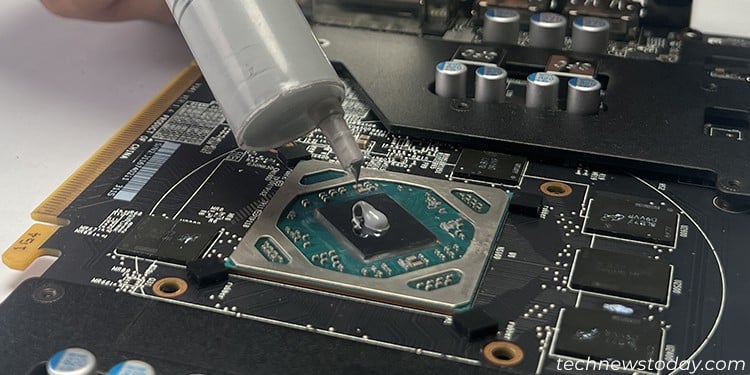
2. Now apply thermal paste to the center of the top side of the CPU . We recommend using pea-sized amounts, or consider larger chunks if your CPU size is large. Basically, if you have the new 13th Gen Intel Raptor Lake and Ryzen 7000 CPUs, you’ll need to apply twice as much thermal paste as usual to ensure you cover a larger surface area.
Too little thermal paste is more harmful than too much , as you’ll see in the next section when we compare different thermal paste applications. However, be careful not to add so much that it starts leaking onto the motherboard. If so, wipe the affected area with a microfiber cloth and isopropyl alcohol.
Note: For AMD Threadripper and Intel Xeon CPUs, due to the huge surface area of the processor, some enthusiasts tend to use a thermal paste applicator tool to spread the thermal paste as evenly as possible across the CPU. If you do a build like this, be sure to apply the appropriate amount of thermal paste.
3. Next, check if there is a protective film on the side of the AIO or air cooler that touches the surface of the CPU. In most cases, the plastic film that protects the surface of your air cooler will need to be removed before installation . This plastic film is on both the AIO and the air cooler, and if you forget it, you’ll end up with a layer of plastic between the CPU and the heatsink. This will cause the CPU to overheat quickly.
4. Next, proceed to installing the air cooler or AIO to the CPU. Install the cooler and screw in one corner first, then the diagonally opposite corner, so that the thermal paste spreads evenly . You will need to repeat this process on the other two corners until the AIO or air cooler is securely seated in place. We recommend screwing in diagonally and slowly tightening each screw.
5. Voila! You have successfully applied thermal paste to your CPU. Look around the CPU cooler mount to see if there is any overflowing thermal paste. If there is any dirt, wipe it with a microfiber cloth and make sure the layer of thermal compound is not too thick.
Now that the installation process is complete, you should also test your CPU for overheating by following these steps:
Best way to apply thermal paste to CPU
This section aims to present the results of testing different patterns while applying thermal paste. The patterns we tested are:
- small dot
- line
- cross
- square
- Small grain-sized dots
- Apply thermal paste to the CPU
We also tested two additional scenarios that focused on volume and compared the results of using too much and too little thermal paste . Here you can see images of different thermal paste application patterns.
How to Apply Thermal Paste on CPU Pea-sized thermal paste 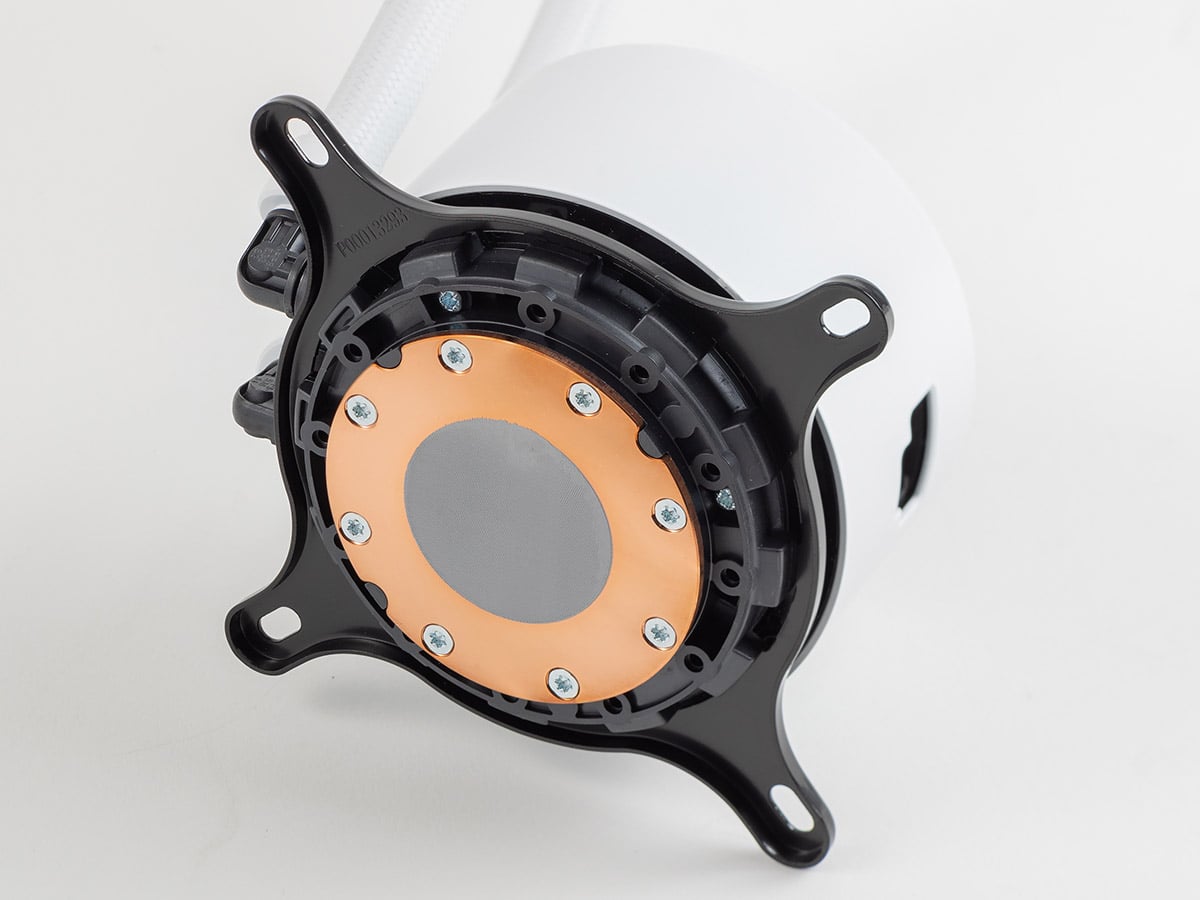
How to Apply Thermal Paste on CPU line shape 
How to Apply Thermal Paste on CPU Cross (X) 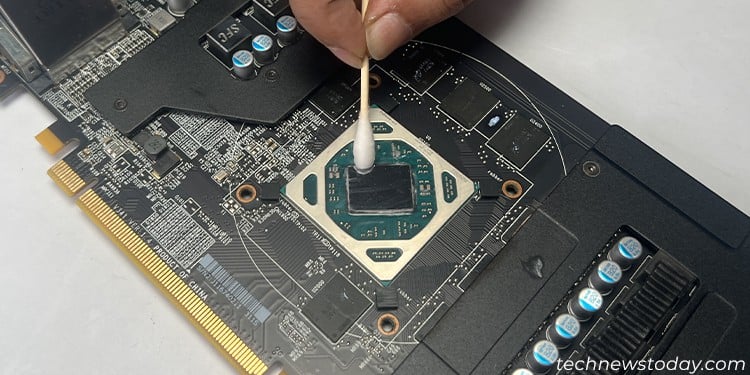
How to Apply Thermal Paste on CPU Manually apply thermal paste to the CPU 
How to Apply Thermal Paste on CPU rectangle 
How to Apply Thermal Paste on CPU Too little heat dissipation paste 
How to Apply Thermal Paste on CPU Applying too much thermal paste to the CPU
For our test setup, we used Noctua NT-H1 Thermal Paste on a Ryzen 2700 overclocked to 3.90GHz@1.35V . This isn’t the best overclock , but it does push the CPU beyond its standard power limits. This is what I wanted for this test. We generally recommend using PBO for AMD CPUs . For this test, we used the Wraith Prism CPU cooler at 100% fan speed. To test thermal performance, we ran a 15-minute stress test on the CPU for each thermal paste pattern.
So what did our testing reveal? Our first observation is that the pattern of thermal paste doesn’t matter if you’re applying enough between the CPU and the heatsink. That’s it. Whether it was line, cloth, or too much thermal paste (not recommended), the maximum temperature was around 77-78 degrees Celsius and the average temperature was around 75-76 degrees Celsius. However, if you manually apply some good old pea-sized dots and thermal paste, you’ll see slightly better results and lower temperatures.
Note : The “maximum” CPU temperature shown in the demo below refers to the temperature reading when the CPU experiences a sudden spike in power consumption.
However, you should have already noticed an anomaly in the graph. I found that using too little thermal paste resulted in the largest temperature difference . As shown in the graph below, the maximum CPU temperature increased to 84.5 degrees Celsius, and the average CPU temperature was about 5 degrees Celsius higher than the other application methods.
Now, what’s the best way to apply thermal paste? It doesn’t seem to matter much , but I highly recommend applying a pea-sized dot in the center, adjusting the size according to the surface area of your CPU. Masu. In our guide, we found that when installing the Intel Core i9-13900K, to achieve sufficient heat synthesis and good cooling, you need to apply a large blob in the center instead of a pea-sized dot. I did.
Run a stress test to check CPU temperature
Once the application pattern and process are in the way, you should check the temperature of the CPU in both idle and loaded conditions to ensure successful thermal paste application.
First, if you don’t have Windows installed, enter your PC’s BIOS by pressing the relevant key during startup. You can monitor your CPU idle temperature here. It should be about 25 to 45 degrees.
Note: After installing the CPU cooler, check the BIOS itself to see if the processor is overheating. If the temperature is not suitable, you will need to reinstall the CPU cooler and run the thermal paste application process again. If it still overheats, your CPU cooling solution may be insufficient, depending on how much heat your processor generates. Therefore, check the maximum supported TDP of your CPU cooler and compare it to the power rating of your processor. Then replace it with a new one to lower the temperature.
Then, after installing Windows, use a stress testing application such as Cinebench R23 or Prime95. Run these stress tests and observe the temperature using one of the methods in our guide on how to check your CPU temperature. Maximum allowable temperature at full load is 95 degrees Celsius. However, the ideal range is around 60 to 70 degrees Celsius. Therefore, when playing online games, browsing the web, or performing other common computing tasks, the CPU temperature should be higher than the idle temperature and lower than the stress test load temperature. .
Note: CPU temperatures vary greatly depending on the processor you are using and the ambient temperature. Manufacturers design CPUs around thermal limits and start throttling when they exceed them. Throttling typically begins to occur at the 95°C mark and often occurs during extended loads. Most processors used in laptops or desktops typically have a 95°C limit, but new Intel Raptor Lake processors such as the Core i9-13900K have a 100°C limit instead.
Temperatures should be kept in mind in both idle and load scenarios. Does it match the performance of your CPU cooler? If not, your CPU cooler isn’t cooling your processor effectively.
How often should thermal paste be replaced
As a general rule of thumb, the thermal paste between the CPU and the cooler should be replaced every year. However, if you are an intensive user, your CPU temperature may rise faster than expected. You can check the CPU temperature in Windows 11 using the method described in our dedicated guide.
An increase in temperature indicates that it is the best time to clean the internal dust that has accumulated over several months of use. Therefore, keep an eye on the temperature of your CPU after 4-6 months of use. If your CPU’s average operating temperature increases, it’s time to replace your thermal compound.
You have now learned how to apply thermal paste to your processor and a stress test has confirmed a successful installation. We have already prepared a guide to help you choose the best thermal paste for your CPU on the market. However, keep in mind that while thermal paste is essential, a high-performance cooler that can keep up with your CPU’s TDP (power consumption) is also a key element to keep your PC running reliably. That’s why we introduce you to the best CPU coolers for your PC build. Finally, if you still have any doubts, let us know in the comments section below. We will support you.
For most processors, a pea-sized amount or a thin line of thermal paste is sufficient. 13th Gen Intel and Ryzen 7000 processors have a larger surface area, so use twice as much thermal compound. Also, if you have an Intel Xeon or AMD Threadripper CPU, which has an even larger surface area, you’ll need to use a lot more thermal paste. Be sure to spread it out evenly to maintain CPU temperature.
no. Do not reuse old thermal paste. Before reapplying the thermal paste, you must remove any traces of it from the CPU using a 99% isopropyl alcohol solution. If you remove the CPU cooler from the processor, be sure to reapply the thermal paste.
You need to access the BIOS and check the idle temperature of your CPU (ideally between 25 and 45 degrees Celsius). Also, run a stress test such as Prime95 on Windows and check the CPU temperature. When under load, the temperature should not exceed 95 degrees Celsius. However, once the temperature exceeds 95 degrees Celsius, the CPU will automatically start thermal throttling. Intel’s new CPUs throttle at about 100 degrees Celsius.
Many people have tested putting different patterns on the CPU, such as an “X” or a “star.” Users have also tried using too much or too little thermal paste. Now, some tests were surprisingly good, while others were disastrous. So what is the correct way to apply thermal paste? The answer is simple. Appropriate amount in the middle depending on the surface area of the CPU.
You can clean up any thermal paste residue left on your CPU. Use a 99% isopropyl alcohol solution and a microfiber cloth. Before replacing your CPU cooler, remove all traces of thermal paste.


![How to set up a Raspberry Pi web server in 2021 [Guide]](https://i0.wp.com/pcmanabu.com/wp-content/uploads/2019/10/web-server-02-309x198.png?w=1200&resize=1200,0&ssl=1)

")


 in Roblox")
")


")


")


")
