Don’t know how to change the refresh rate of your monitor? It’s not that difficult. We will help you change the refresh rate of your monitor accordingly, so you don’t have to worry at all. If you own a gaming monitor with a high refresh rate and are having trouble with your current settings. This guide will help you change the refresh rate to the correct value, such as 144Hz or 240Hz, based on what your cable and monitor support. Steps to change refresh rate on both Windows 10 and Windows 11 operating systems. With that said, let’s take a look at how to change the refresh rate of your monitor.
Be sure to check the maximum resolution and refresh rate supported by your HDMI, DisplayPort, cable, and monitor you are using before proceeding. We’ve shown you how to check these factors if you can’t change your monitor’s refresh rate. 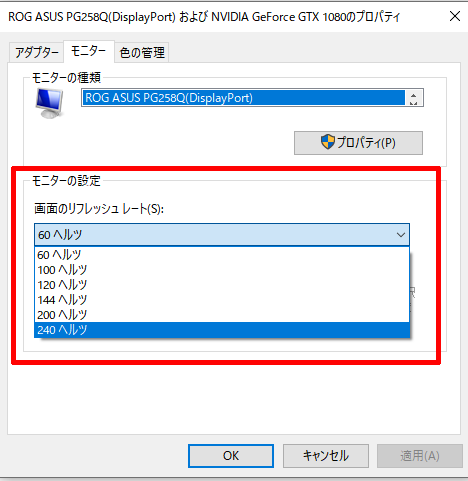
Change your monitor refresh rate in Windows 11
1. Right-click the desktop and click Display Settings in the context menu.
2. Next, go to ” Advanced View ” in Display Settings.
3. Under Advanced Display Settings, you will see a “ Select Refresh Rate ” option. Click the dropdown to see the different refresh rates supported by your monitor. Select the highest refresh rate for your monitor here.
4. Perfect! You have successfully changed the refresh rate of your monitor using the Windows 11 Settings app. 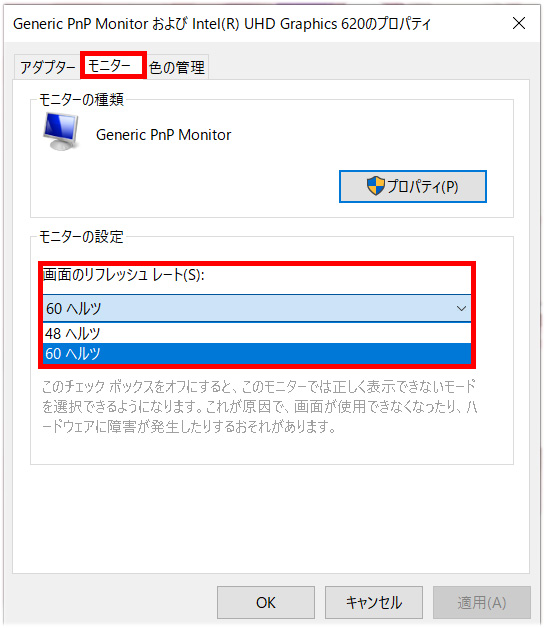
Change your monitor refresh rate in Windows 10
The steps to adjust your monitor’s refresh rate in Windows 10 are similar to Windows 11, but there are some differences. Here’s how:
1. First, right-click the desktop and click ” Display Settings “.
2. Then click on Advanced Display Settings as shown below.
3. Next, select the display whose refresh rate you want to change and click Display Adapter Properties at the bottom.
4. Go to the Monitor tab in the pop-up menu.
5. Here you will find the “ Screen refresh rate ” option. Click the drop-down menu to set the refresh rate for your monitor.
6. Congratulations! You have successfully changed the monitor refresh rate on your Windows 10 computer. 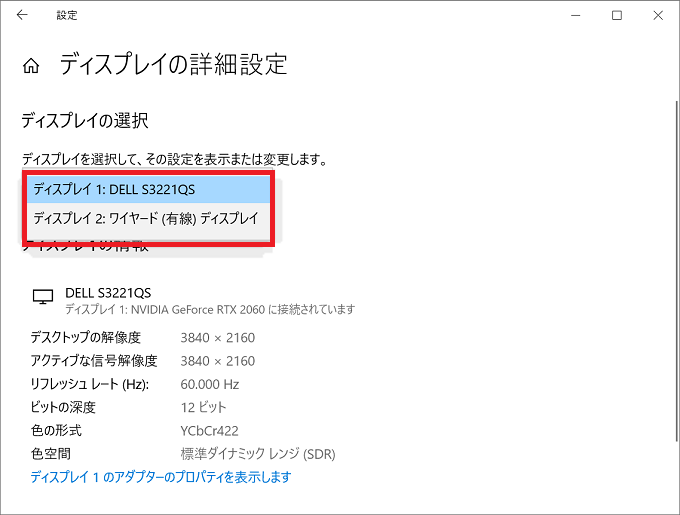
Can’t change your monitor’s refresh rate? How to fix it!
If you have a gaming monitor that supports high refresh rates, you may run into an issue where you cannot change the monitor’s refresh rate. Many users encounter this issue from time to time, but don’t worry, our guide has reliable solutions. 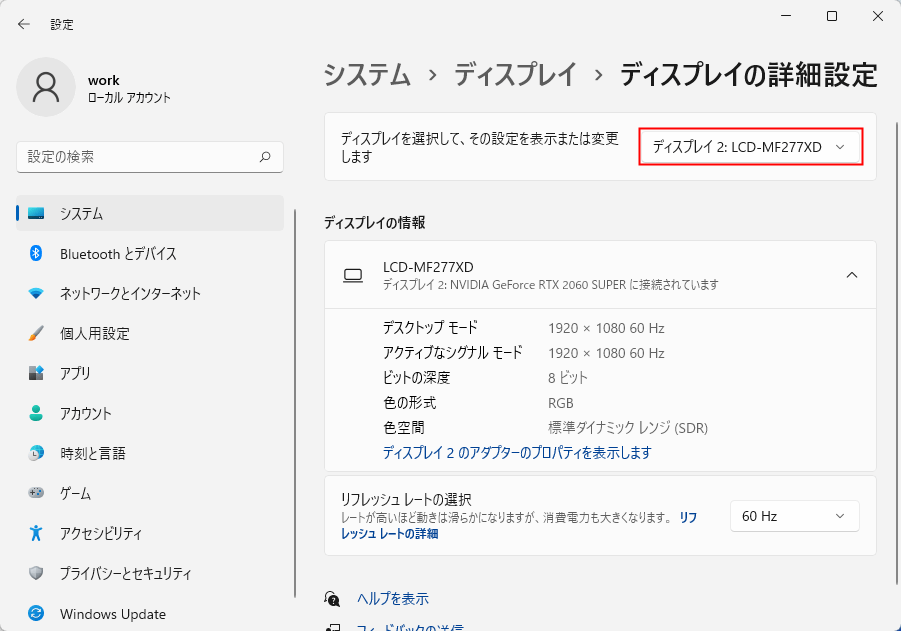
1. Check the display cable
Whether you’re using a VGA, HDMI, or DisplayPort cable, you should know that there are many variations of cables. It’s also quite possible that your video cable doesn’t support the refresh rate and resolution your monitor requires. In this case, you will need to check the type of cable you are using and the maximum refresh rate supported.
To compare and check HDMI cable versions and see supported refresh rates, see this version comparison . For DisplayPort, you can check the bandwidth of your cable version here . Finally, check if your bandwidth is sufficient to support your desired resolution and refresh rate .
2. Unplug and replug the display cable
In some cases, the OS may not correctly recognize the supported display resolutions and refresh rates. In this case, disconnecting and reconnecting the display cable from both your PC and monitor may resolve the issue. After that, restart your PC and check if this fix worked.
3. Update your graphics driver
Perhaps another reason why your monitor isn’t running at the correct refresh rate is your current GPU driver. To apply this fix, please refer to our dedicated guide on how to update GPU drivers. We have provided instructions for both manual and automatic driver updates. Also be sure to check out the “clean install” option for your GPU. This will completely erase all previous drivers.
4. Check the maximum supported refresh rate
Whether your PC has an integrated or dedicated GPU, or if you’re using a laptop, you’ll also need to make sure that the ports themselves support the required resolution and refresh rate that you want to achieve on your monitor. there is.
So check your laptop or PC’s manual (or your desktop GPU’s specifications page) to find out which version of HDMI or DisplayPort you have. Next, refer to the first fix to compare and check the versions and see if the port has enough bandwidth to provide the required refresh rate.
Set monitor refresh rate in Windows 10/11
If you followed the steps mentioned in the guide, you have successfully changed the refresh rate of your monitor. I hope you’re not having any issues with the refresh rate. Fun fact – Did you know that the new Radeon RX 7900 XTX and 7900 XT GPUs support DisplayPort 2.1?This allows these GPUs to theoretically support 8K @ 165Hz and 4K @ 480Hz. You can also learn about curved monitors and how they can improve your experience here. If you have any questions or issues regarding changing your PC’s refresh rate, let us know in the comments.
FAQ
This could be caused by a cable or a port on your PC. Therefore, check whether your current settings support your desired refresh rate. You can also try updating your GPU driver to fix the issue where your 144 Hz monitor is limited to 60 Hz.
No, a monitor that only supports a 60Hz refresh rate cannot run at 144Hz.
No, different versions of HDMI cables support different bandwidths. Therefore, you need to check if your HDMI cable supports 144Hz.
120Hz is much better than 60Hz as the overall responsiveness is much better. The higher the refresh rate, the smoother the motion.


![How to set up a Raspberry Pi web server in 2021 [Guide]](https://i0.wp.com/pcmanabu.com/wp-content/uploads/2019/10/web-server-02-309x198.png?w=1200&resize=1200,0&ssl=1)

")


 in Roblox")
")


")


")


")
