Dust is the enemy of all electronic devices, and keyboards are no exception. They sit on our desks all the time, uncovered and unprotected, waiting for dust to sneak in through every crevice and gap between the keycaps. Over time, dust buildup can clog switches and keys, cause malfunctions and missed keystrokes, and shorten the overall lifespan of your precious (and expensive) mechanical keyboard. You can’t do that now, can you? Therefore, it is important to clean your mechanical keyboard regularly. This guide will show you the best ways to clean your mechanical keyboard and keep it working like new. 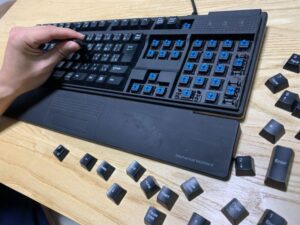
Simple preventive cleaning method
A quick wipe down regularly is a great way to keep dust and dirt away from your mechanical keyboard and keep it looking fresh. After all, aesthetics are one of the reasons you invest in a mechanical keyboard in the first place, right? Letting it collect dust defeats its purpose. 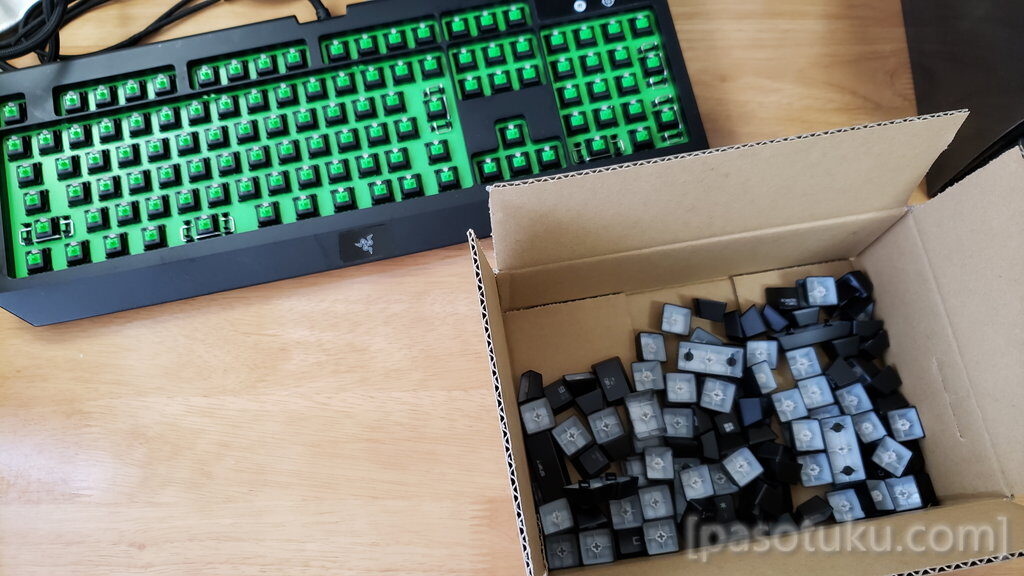
Step 1: Disconnect or remove the keyboard
Please disconnect your mechanical keyboard from your PC before starting the cleaning process. If your mechanical keyboard is wired, carefully disconnect the wire from your computer’s USB port. That way, your PC won’t record any accidental key presses. I learned this the hard way. Trying to clean a mechanical keyboard with it connected was nothing short of a nightmare. When I looked back at the monitor, the browser was in full-screen mode, gibberish was being typed into the search bar, the toggle key was on, the microphone was disabled, and a whole host of other problems appeared for several minutes. It took. Diagnose and solve.
Lesson learned — always unplug your keyboard before cleaning it.
Step 2: Dust and remove debris
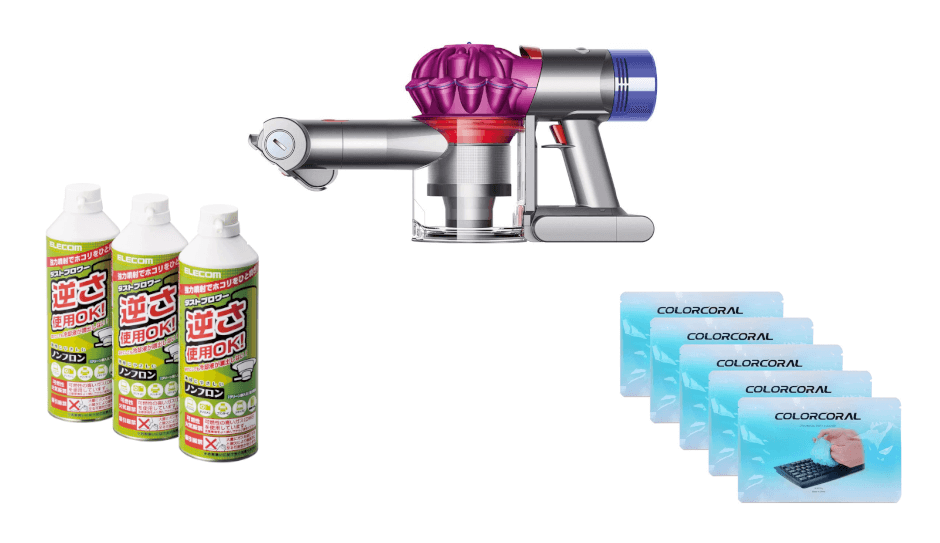
Use a rubber air pump to blow air over and between the keys to remove dust, crumbs, and debris. Do not use a can of compressed air to clean a mechanical keyboard. The low temperatures can cause condensation , which can cause corrosion if the keyboard has a metal surface. You may also end up blowing dust into the switches on your mechanical keyboard. This is the exact opposite of what you were trying to achieve in the first place.
Alternatively, you can use a brush to loosen debris between the keycaps. I highly recommend purchasing the Hagibis 5-in-1 cleaning kit, which I have recommended in previous YouTube shorts . It comes with a great cleaning brush that works wonders for cleaning your keyboard. Plus, it’s extremely satisfying to slide between the keys.
Buy Hagibis 5-in-1 Multifunctional Computer Cleaning Kit on Amazon ( $12.99 ) . Now flip the keyboard over and give it a gentle shake (or tap the back a few times) to remove any dust particles that may have collected under the keycaps.
Step 3: Wipe
Use a damp microfiber cloth to clean the keyboard. Then wipe it with a dry microfiber cloth and your viola is done. Don’t forget to clean your WASD and other regularly used keys to remove gamer dirt. 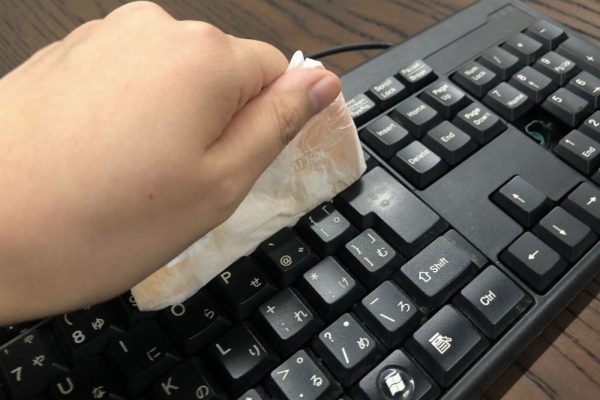
Deep cleaning of mechanical keyboard
In some cases, you may need to deep clean your mechanical keyboard, which is a more intensive and time-consuming process. But it’s worth every second. So let’s get down to business.
Step 1: Disconnect or remove the keyboard
Whether you’re performing basic cleaning or going all in, always remember to unplug or unplug your keyboard from your PC to prevent accidental keystrokes.
Step 2: Remove the keycap
First, we recommend clicking on the photo of the keyboard . Useful when reassembling the keyboard. Trust me on this one.
Next, use a keycap puller to remove all keycaps from the keyboard. Most mechanical keyboards include a keycap puller in the box. However, if it doesn’t come with a keycap puller, you can buy an inexpensive keycap puller on Amazon. We recommend a wired puller like this one , as plastic keycap pullers can damage your keycaps if you’re not careful.
Long and large keys such as Backspace, Right Shift, Left Shift, Space Bar, and Enter are also supported by Stabilizer, so they can be a little difficult to remove, but if you take the time, you should be able to remove them without any problems. You may want to remove one side of these long keycaps first, then the other side.
Step 3: Wash the keycaps
Place the keycaps in a large enough bowl or container. Fill a container with warm water, add dish detergent , and gently stir this mixture with your hands until it foams. Leave these keycaps soaked for a few hours while you clean the top panel of your mechanical keyboard.
Once they have been in the bath for a sufficient amount of time, remove them from the container, wash them well, and lay them out on a towel, stem side up (upside down), to dry. You can move on to the rest of the board while the keycaps enjoy your spa day.
Step 4: Clean between the lines
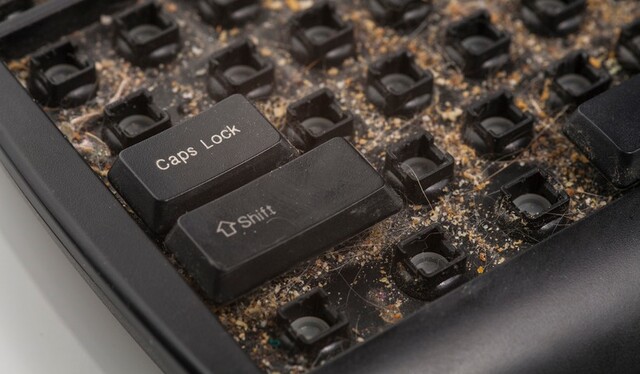
When you remove the keycaps, you may find that your mechanical keyboard has accumulated a lot of dirt and grime, staring directly into your soul. It’s an overwhelming feeling (and not a good one). Let’s get rid of it.
Using a brush is a great way to remove and remove debris from the top plate. It also makes it easier to clean hard-to-reach corners and between switches. You can also use a damp microfiber cloth to wipe the top plate.
For stubborn stains, you’ll need something a little more pizza-like (not to be confused with pizza). Prepare a cotton swab and a bottle of isopropyl alcohol . Wet the end of a cotton swab with isopropyl alcohol and begin cleaning the rows between the switches. It may take some time, but you will end up with a shiny new tabletop.
Step 5: Clean the base
To clean the rest of the board, use a microfiber cloth (gently) soaked in soapy water. Make sure the microfiber cloth is damp and not wet to avoid getting water into your mechanical keyboard. If you polish it thoroughly, it will be as clean as rain.
Step 6: Undo
Once everything is clean and dry, you can start reassembling. Remember that picture you clicked earlier (before you removed the keycaps)? You can refer to this to see which keycaps go where on your keyboard. Put them on one by one and you’re good to go.
super deep cleaning
Life is not perfect and sometimes accidents happen. I was drinking a coke or iced coffee on a hot summer night and BAM! I just spilled it all on my keyboard. It’s so messy that it takes extra effort to clean it. Sugary drinks tend to leave a sticky residue, so simply unplugging your keyboard and leaving it outside to dry won’t help. Not only is it uncomfortable to touch, but it can also cause the switch to jam or cause a short circuit.
Cleaning a mechanical keyboard that has had a drink spilled on it can be a little difficult as you have to take it apart and carefully remove all the sticky residue. However, it is possible. Please take your time and follow the instructions. Let’s go!
Step 1: Remove the keyboard
If you spill something on your mechanical keyboard, remove it from your PC immediately. Do not press any keys. A short circuit could occur and damage the USB input, turning your keyboard into a mere paperweight.
Step 2: Remove the keycaps
Remove all keycaps from your mechanical keyboard using a wired keycap puller as described above. Please be gentle and take your time.
Step 3: Clean the keycaps
Place the keycap in a container of warm water and dish soap. Stir by hand and let steep for several hours. Rinse thoroughly and spread upside down on a towel to dry. This process is the same as described in the deep cleaning section above.
Step 4: Remove dirt
Wipe the mechanical keyboard with a damp microfiber cloth to remove any dirt or sticky residue. Use cotton swabs for hard-to-reach areas such as corners and between switches. You can use isopropyl alcohol instead of soapy water for this cleaning to more effectively remove stubborn dirt and grime.
Step 5: Getting too deep
If you’ve spilled a drink on your keyboard, there’s a good chance the case has gotten soaked as well, in which case (we’re not kidding) you’ll need to take your mechanical keyboard apart and give it a thorough cleaning.
Please note: Disassembling your mechanical keyboard will void your warranty. Only try this if you are comfortable working with electronic equipment and know what you are getting into. Otherwise, seek help from someone experienced or consult a professional. If your keyboard is under warranty, send it to the manufacturer for repair.
If you’ve decided to take on a deconstructing adventure, we’d love to hear from you. However, we recommend that you proceed with caution and at your own risk.
The disassembly process may vary depending on the keyboard manufacturer and model. For best results, refer to your keyboard manual or refer to or read your keyboard disassembly guide.
However, the basic process is to remove the keycaps, remove all visible screws (some may be hidden under stickers or under the keyboard’s rubber feet), and gently pull the top plate off. Lift it up. Be gentle during this process and avoid pulling on anything with excessive force.
When you lift the top plate/PCB (printed circuit board) out of the case, you may notice a small wire going into the header of the keyboard PCB. Carefully disconnect the wires from the connector and pull the top plate away from the rest of the board. The keyboard I used for demo purposes didn’t have such a feature, but most keyboards have it.
You may also notice that there are some screws on the back of the PCB to attach the PCB to the top plate. Remove the screws to separate the two layers.
Once all components are separated, inspect each for any sticky residue or dirt. Clean each surface of your mechanical keyboard using a microfiber cloth or cotton swab lightly dipped in isopropyl alcohol. As we discussed in our guide to applying or replacing thermal paste on your CPU, isopropyl alcohol is a great cleaning agent for electronics. It kills bacteria, evaporates quickly and leaves no trace of oil, eliminating the possibility of corrosion or liquid damage.
Step 6: Reassemble the keyboard
Once the keyboard is clean, put everything back together. This is much easier than taking it apart. Just reverse the disassembly steps.
- Screw the PCB back into the top plate
- Connect the USB/battery cable to the designated header on the bottom of the PCB.
- Put the top plate back into the case, tighten the screws and finally
- Reinstall the keycap. That’s it, everyone!
There are multiple ways to clean a mechanical keyboard. But it’s essential to keeping your board fresh and extending its lifespan. Plus, it’s a form of therapy. You don’t need to thoroughly clean your mechanical keyboard every two weeks, but you should clean it every six months just to be safe. Follow these steps to properly and safely clean your mechanical keyboard. Or if you have other (and better) cleaning methods, let us know in the comments below.


![How to set up a Raspberry Pi web server in 2021 [Guide]](https://i0.wp.com/pcmanabu.com/wp-content/uploads/2019/10/web-server-02-309x198.png?w=1200&resize=1200,0&ssl=1)

")


 in Roblox")
")


")


")


")
