Apple is gradually introducing many file management features to both iOS and iPadOS. This can be seen as another effort by Apple to make its devices even more productive and convenient. iOS 13 and iPadOS 13 allow you to extract ZIP files natively on your device. This is amazing. That’s not all. You can also create ZIP files directly from the Files app. So, in this article, we bring you a simple guide on how to compress and unzip ZIP files on iPhone and iPad. We also discussed other methods that handle other archive formats and can be used with iOS 12. That being said, let’s go ahead and learn the steps.
Compress and extract archive files on iPhone and iPad
As mentioned above, you can manage archive files natively through the Files app in iOS 13 and iPadOS 13. However, only two archive file formats are supported (ZIP and RAR) and there are some limitations to compressing files. So, if you want to unzip other file formats like TAR or 7z without any restrictions, you can use the Shortcuts app method mentioned below. Additionally, if you’re using iOS 12, you can also use the Shortcuts app to seamlessly compress and unzip files.
For iOS 13 and iPadOS 13
iOS 13 natively supports unzipping both ZIP and RAR files . However, you can only compress folders using the ZIP file format. This is sufficient for most purposes and works very well. If you want more options, move on to the next section. That being said, here are the steps to follow:
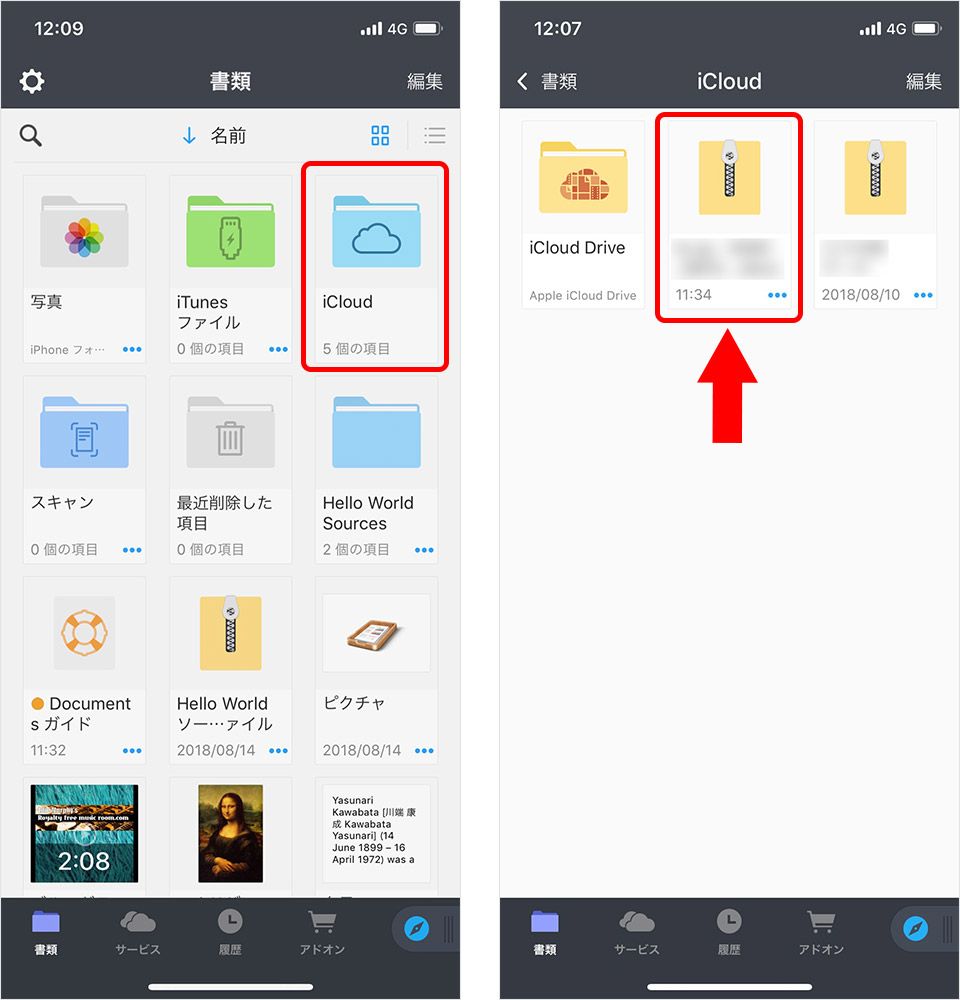
1. To unzip a ZIP or RAR file, open the Files app on your iPhone or iPad and find the file you want to unzip. Tap and hold the compressed file to see several options. Tap “Extract” at the bottom and a new folder will be created there with all the contents.

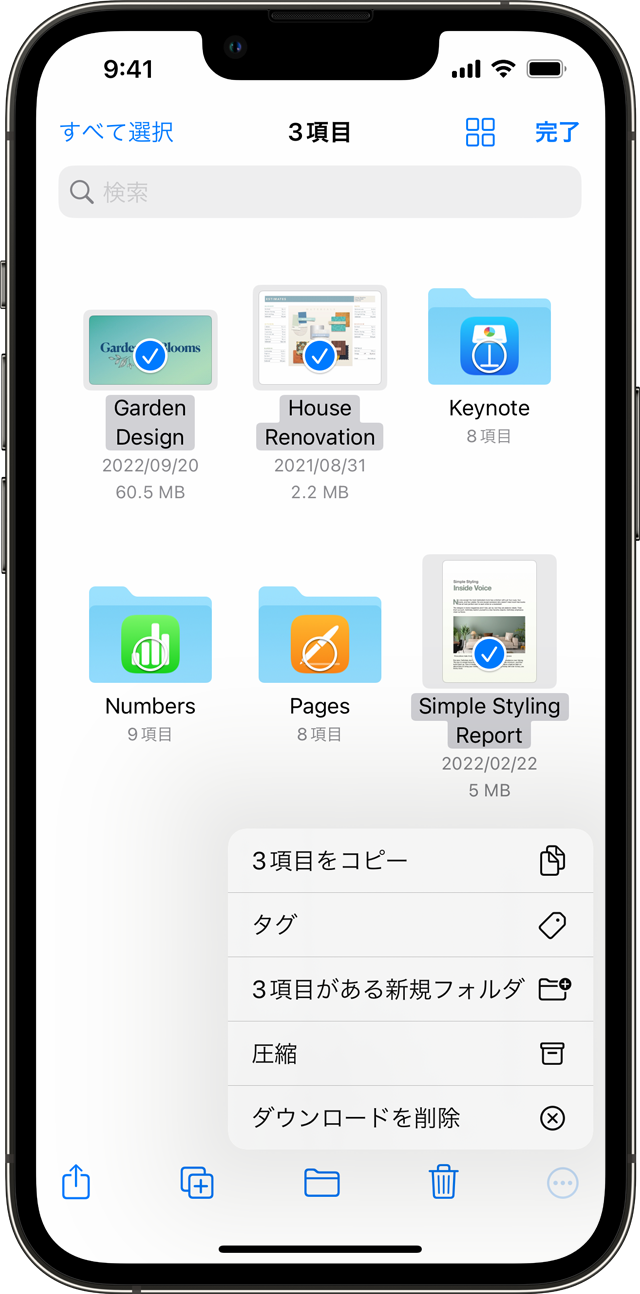
2. Similarly, to compress a folder on your iPhone or iPad, press and hold the folder you want to compress and select Compress at the bottom. A ZIP file will be created on the fly.
For iOS 12 and other archive formats
1. Open the Shortcuts app and tap the “+” button in the top right corner. Then search for “zip” and tap “Create Archive” to compress the file. Similarly, you can add “Extract Archive” as another shortcut to unzip files.
2. Next, tap the edit icon in the top right corner and enable the Show in Share Sheet toggle . Additionally, you can name your shortcut.
3. Then change the format to “Ask at runtime” so you can choose your preferred archive format. Once that’s done, tap the “Done” button in the top right corner to save the shortcut.
4. Next, share the file in the Shortcuts app and select the specific shortcut.
5. The Save dialog box will appear. Change the file format here and tap Done to finally compress the file. You can find compressed files in the Files app.
See also: 10 tips to improve iOS 13 security and privacy
Unzip files on the fly on your iPhone or iPad
That was a quick guide on how to compress and unzip ZIP files on iPhone and iPad. If you’re updating to iOS 13 or iPadOS 13, the process is easy because your system supports these features natively. However, if you need more flexibility, you can use the second method. Anyway, that’s it from us. If you liked this simple guide, let us know by commenting below.


![How to set up a Raspberry Pi web server in 2021 [Guide]](https://i0.wp.com/pcmanabu.com/wp-content/uploads/2019/10/web-server-02-309x198.png?w=1200&resize=1200,0&ssl=1)

")


 in Roblox")
")


")


")


")
