While macOS has always seemed perfect to me in many ways, there are some drawbacks that sometimes let me down. The lack of an easy way to hide sensitive files has never puzzled me, even if the lack of a simple dark/light mode or turbo boost toggle seems hard to explain. In an era where additional shielding from prying eyes is the need of the hour, a quick way to keep sensitive files private is needed. So, what’s the workaround? It turns out that there is a workable trick to hide or unhide files and folders in Terminal on Mac. If you are familiar with using terminal commands, you will find this hack very useful. Let’s find out!
Hide, show, and unhide files and folders using Terminal on macOS
It’s always good to clear some questions first, especially when dealing with a hack like this one.
Is there something complicated involved?
no. So as long as you have easy access to (or remember) the Terminal commands, you can quickly hide files on your Mac. If you want to undo and show those files again, or show hidden files, the commands are different, but you need to follow the same route (direct paths can also be used to show them). These commands work very well and are not complicated at all, so you can learn them without any effort. And yes, you don’t even need to be running the latest version of macOS to use this hack.
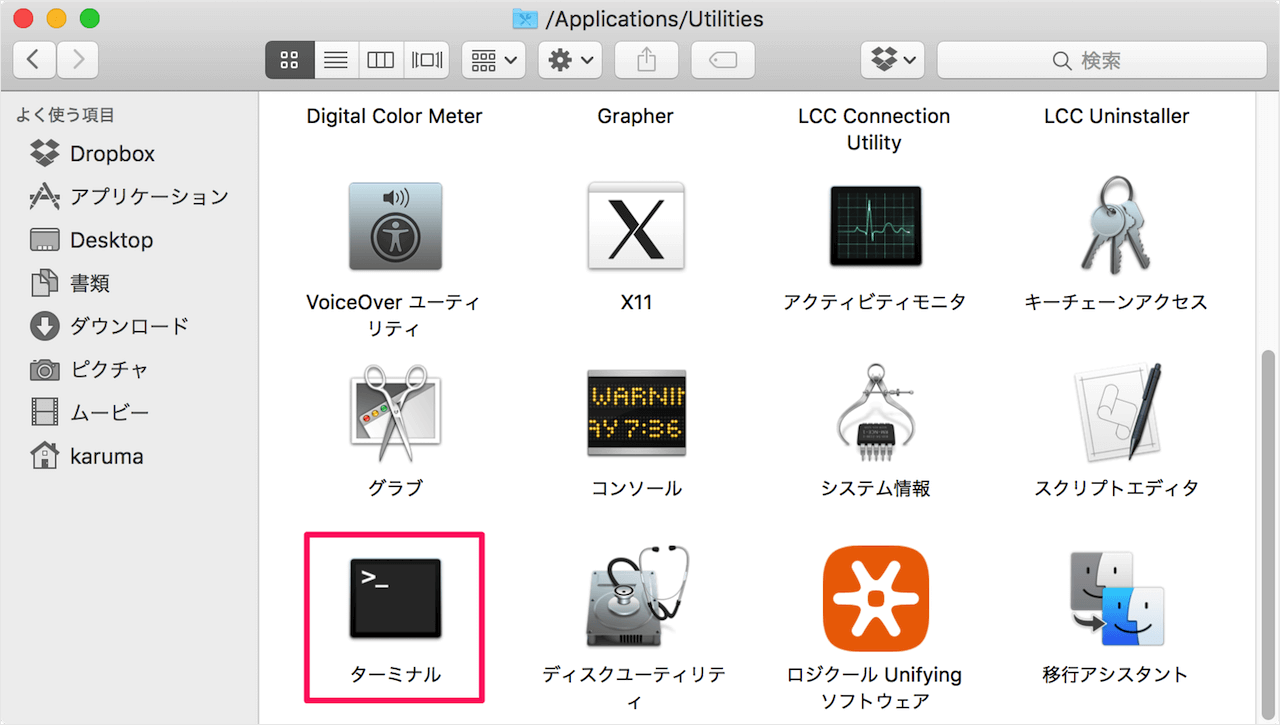
- Launch the Terminal app on your Mac. Spotlight search gives you instant access to apps.

2. Then enter the following command: Do not press Return yet.
chflags hidden 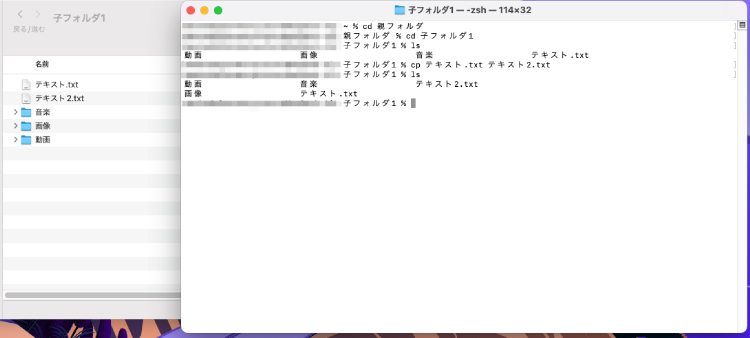
3. Next, add a space after “hidden” .
4. Next, navigate to the file or folder you want to hide and drag it to the end of the command in the terminal window .
5. Finally, press Return.
Voila! Fills disappear on my Mac.
Note: Although this command takes effect immediately, it may not work as expected in some cases. In this case, you may need to restart the Finder to hide the file.
Show hidden files and folders on macOS
Wondering where your files went and how you can access them? Well, it’s as simple as that.
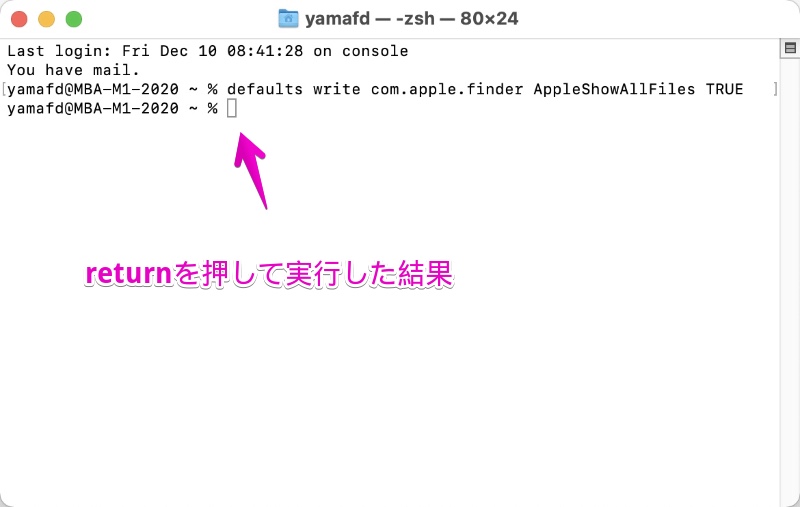
- Open the Terminal app on your macOS device and enter the following command :
defaults write com.apple.finder AppleShowAllFiles -boolean true ; killall Finder 2. Press Return. Now you can see all hidden files in Finder.
Unhide a file or folder on macOS
If you want to unhide certain files that you have previously hidden, you can do so easily.
- Launch the Terminal app on your Mac and enter the following command. Be careful not to press Return yet.
chflags nohidden 2. Next, be sure to include a space at the end of the command. Then drag the file to the end of the command and press Return.
Check it out. Files started appearing in the Finder again. That’s it!
Easily hide and unhide files on Mac
So, these are easy ways to keep all your private files away from prying eyes. While these work efficiently, I wish Apple would provide an easy way to hide files on the macOS operating system. It would be better if this option existed in the customization settings or in the context menu itself. Well, I say this because I don’t think everyone will want to use Terminal commands, except for a few Mac-obsessed users. What do you think about it? Please share your thoughts in the comments section below.


![How to set up a Raspberry Pi web server in 2021 [Guide]](https://i0.wp.com/pcmanabu.com/wp-content/uploads/2019/10/web-server-02-309x198.png?w=1200&resize=1200,0&ssl=1)

")


 in Roblox")
")


")


")


")
