The Xused Framework is probably one of the best things to ever happen to Android. The level of customization afforded by that framework blows away stock Android, not to mention some custom ROMs. This framework further provides support for a large amount of modules that you can use to customize your device according to your preferences. Sadly, the Xused Framework has not been ported to Android Nougat since its introduction. Although the original developer rovo89 said he was indeed working on it, almost a year has passed without any development on the Android Nougat Xused Framework.
But don’t worry, that’s all about to change now. The team behind PurifyOS was finally able to port the Xused Framework to Android Nougat with the help of a modified version of the original Xused by abforce . If you have an Android Nougat device and would like to install Xused Framework on it, read on as we will show you how to install Xused Framework on Android Nougat device.
Update : The Xused Framework has been officially ported to Android Nougat devices and changes have been made to the article to reflect this.
Prerequisites for installing Xused on Nougat:
- Android 7.x (SDK 25)
- TWRP or other custom recovery
Note : I installed the Xused Framework on a Moto G3 running ViperOS Android 7.1.2 and a Moto X Play running AOSP Extended Android 7.1.2. This method works fine in both cases and should support all devices running Android 7.x based on AOSP/Lineage.
Steps to install Xused Framework on Nougat
- First, enable unknown sources on your device to allow the installation of third-party apps. To do this, open Android Settings and go to the “Security” option. Once there, enable the toggle next to “Unknown sources.”

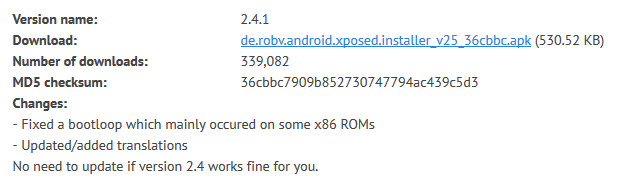
- Next, download the Xused Framework APK from here and install it on your device. This app will later be used to install and manage the various modules of Xused.

- Then, depending on your processor (arm, arm64, or x86), download the Xowned installer ZIP for your device from here.
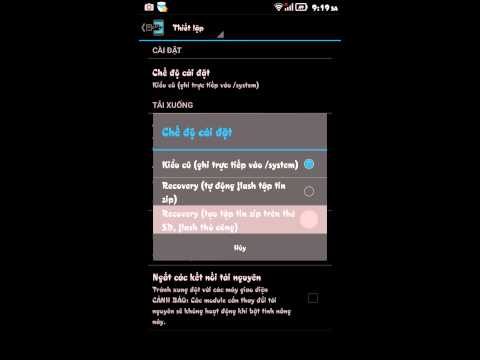
- Once done, reboot your device into TWRP or your custom recovery of choice and flash the Xowned installer ZIP you just downloaded.
- Once done, be sure to “Clear Cache/Dalvik” . Then restart your device to continue.
- After rebooting, go to the Xused installer app . You can see that Xused Framework has been installed.
Note : You may receive a notification that says “Xused is not (yet) compatible with Android SDK version 25 or processor architecture.” Don’t worry, Xused is not officially supported, but it will still work.
- In the Xused installer app, tap the hamburger button in the top left to display the sidebar. Go to the Downloads tab and you will see a list of all the modules you can download and install. Just tap on the module of your choice and choose to download.
Note : If the download feature doesn’t work, tap the Save option instead. The APK file for that module will be downloaded and you can install it using your favorite file manager.

- Once you have installed the modules of your choice, go to Modules from the sidebar. Then tap the checkbox next to the module to enable it. You must restart your device for the module to take effect.
- The module changes occur when the device is restarted. For example, I installed an XSSID indicator that basically shows the SSID of your WiFi in the status bar. It works fine, as below.

See also: How to install and use Magisk on Android
Get Xposed now for your Android Nougat device
The Android community has waited far too long to get Xused Framework support for Android Nougat devices. Android O is almost here, but it’s still several months before manufacturers push updates to supported devices. In the meantime, users can take advantage of Xused features on Android Nougat. Most modules work directly, but some need to be updated to work with the new Xused Framework.
So, try this method to install Xused on your Nougat running device. If you have any doubts, let us know in the comments section below.


![How to set up a Raspberry Pi web server in 2021 [Guide]](https://i0.wp.com/pcmanabu.com/wp-content/uploads/2019/10/web-server-02-309x198.png?w=1200&resize=1200,0&ssl=1)

")


 in Roblox")
")


")


")


")
