What is Terraform? Let’s find out about it.
Infrastructure as Code (IaC) is a term widely used among DevOps professionals. It is the process of managing and provisioning complete IT infrastructure (consisting of both physical and virtual machines) using machine-readable definition files. This is a software engineering approach to operations. Helps you automate your entire data center using programming scripts.
With all the capabilities that Infrastructure as Code provides, there are multiple challenges:
- need to learn coding
- The impact of the change is unknown.
- Changes need to be undone
- Unable to track changes
- Unable to automate resources
- Multiple environments for infrastructure
Terraform was created to solve these challenges.
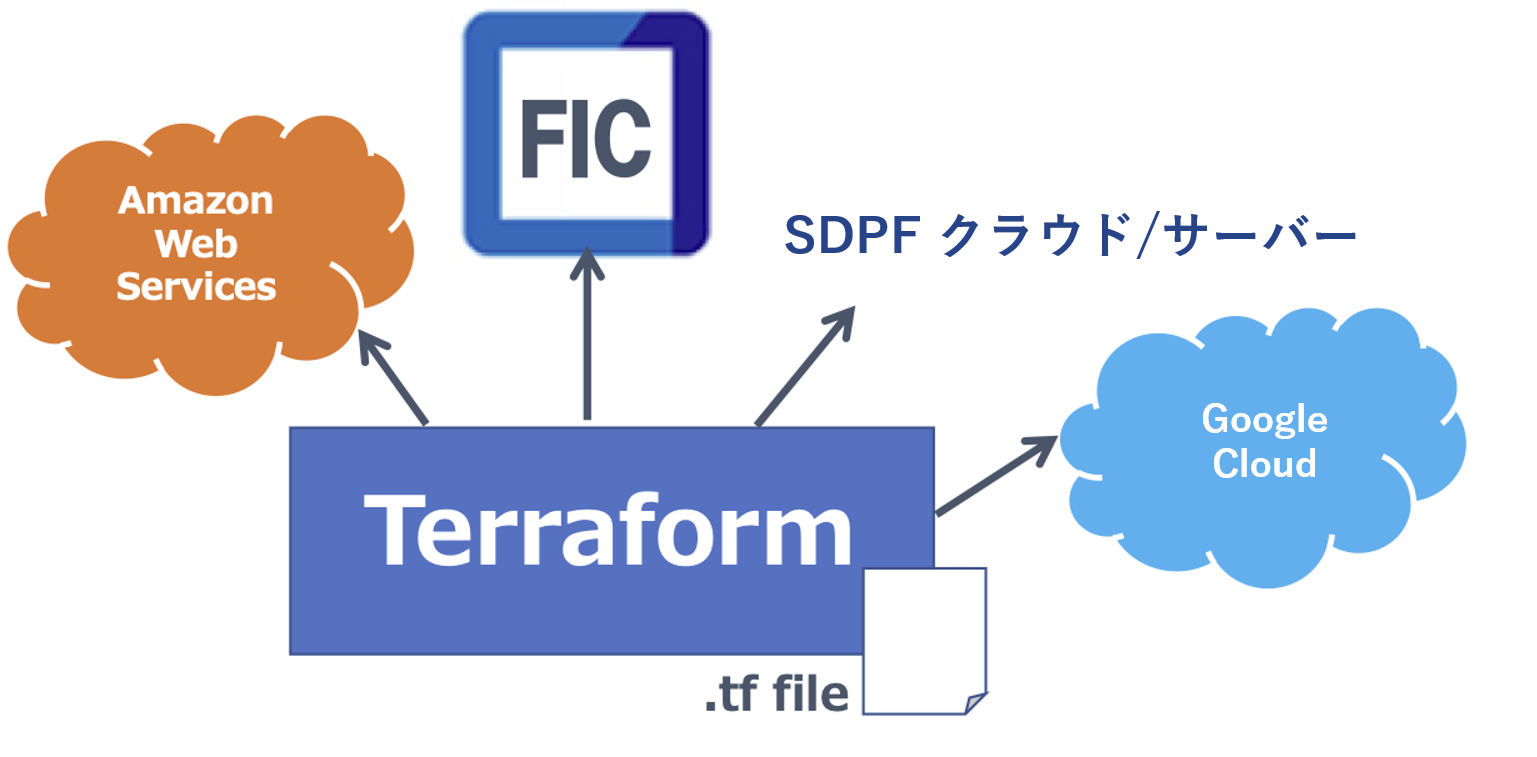
Terraform is an open source infrastructure-as-code tool developed by HashiCorp. It is used to define and provision complete infrastructure using an easy-to-learn declarative language.
This is an infrastructure provisioning tool that allows you to save your cloud infrastructure setup as code. This is very similar to tools like CloudFormation that you use to automate your AWS infrastructure, but only available on AWS. With Terraform, you can also use it with other cloud platforms.
Here are some benefits of using Terraform.
- Perform configuration management as well as orchestration
- Supports multiple providers such as AWS, Azure, GCP, and DigitalOcean
- Provides an immutable infrastructure where configuration changes smoothly
- Uses an easy-to-understand language, HCL (HashiCorp Configuration Language)
- Easily portable to other providers
- Supports client-only architecture, so no additional configuration management is required on the server

Terraform core concepts
Below are the core concepts/terminology used in Terraform.
- Variables : Key-value pairs that are also used as input variables and are used by Terraform modules to enable customization.
- Provider : A plugin that allows you to interact with a service’s API and access its related resources.
- Module : A folder containing a Terraform template where all configuration is defined.
- State : Consists of cached information about the infrastructure and associated configurations managed by Terraform.
- Resource : A block of one or more infrastructure objects (such as a compute instance or virtual network) that is used to configure and manage your infrastructure.
- Data Source : Implemented by a provider to return information about external objects to Terraform.
- Output values : These are the return values of the terraform module that can be used in other configurations.
- Planning : One of the stages of determining what needs to be created, updated, or destroyed to move the infrastructure from its actual/current state to its desired state.
- Apply : One of the stages where changes are applied to the actual/current state of the infrastructure in order to move it to the desired state.
Terraform lifecycle
The Terraform lifecycle consists of init , plan , apply , and destroy .
- Terraform init initializes a working directory consisting of all configuration files.
- Terraform plans are used to create execution plans to reach a desired state of your infrastructure. Configuration file changes are made to achieve the desired state.
- Terraform apply makes changes to your infrastructure as defined in your plan, and your infrastructure is in the desired state.
- Terraform destroy is used to remove any old infrastructure resources that are marked as tainted after the apply phase.
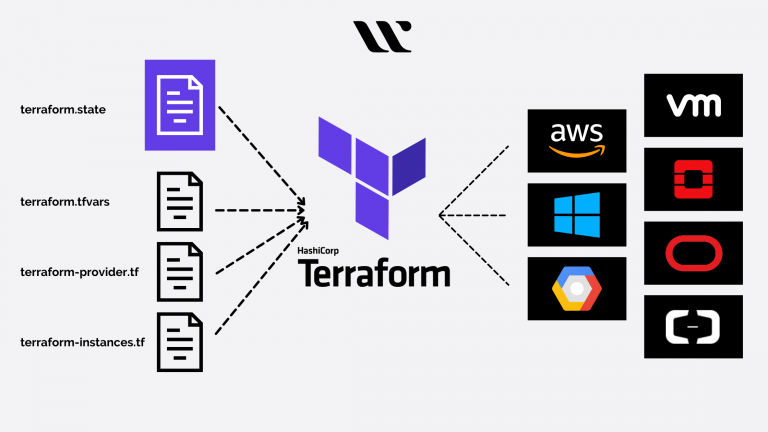
How does Terraform work?
Terraform has two main components that make up its architecture.
- Terraform core
- provider
Terraform core
Terraform core uses two input sources to run jobs.
The first input source is the Terraform configuration that you configure. This is where you define what needs to be created or provisioned. The second input source is the state that Terraform keeps up to date with what the current configuration of your infrastructure is.
So what the Terraform core does is take input and figure out the plan that needs to be executed. Compare the state, what the current state is, and what the desired configuration is in the final result. Determine what needs to be done to reach the desired state within the configuration file. Understand what needs to be created, what needs to be updated, and what needs to be removed to create and provision your infrastructure.
provider
The second component of the architecture is the specific technology provider. This could be a cloud provider such as AWS, Azure, GCP, or other infrastructure as a service platform. It is also a provider of higher-level components, such as Kubernetes and other Platform-as-a-Service tools, as well as some software as self-service tools.
This allows you to create infrastructure at different levels.
For example, create an AWS infrastructure, deploy Kubernetes on top of it, and create services/components within that Kubernetes cluster.
Terraform has over 100 providers for different technologies, and each provider provides Terraform users with access to its resources. For example, you can access hundreds of AWS resources, such as EC2 instances and AWS users, through your AWS provider. Kubernetes providers provide access to resources such as commodities, services, deployments, and namespaces.
This is how Terraform works, and in this way it allows you to provision and cover a complete application setup from infrastructure to applications.
Let’s try some practical things. 👨💻
Install Terraform on Ubuntu and provision very basic infrastructure.
Install Terraform
Download the latest terraform package.
To get the latest version of each OS, please visit the official download page .
 @:~$ wget https://releases.hashicorp.com/terraform/0.13.0/terraform_0.13.0_linux_amd64.zip
--2020-08-14 16:55:38--
https://releases.hashicorp.com/terraform/0.13.0/terraform_0.13.0_linux_amd64.zip
Resolving releases.hashicorp.com (releases.hashicorp.com)... 151.101.153.183, 2a04:4e42:24::439
Connecting to releases.hashicorp.com (releases.hashicorp.com)|151.101.153.183|:443... connected.
HTTP request sent, awaiting response... 200 OK
Length: 34851622 (33M) [application/zip]
Saving to: ‘terraform_0.13.0_linux_amd64.zip’

terraform_0.13.0_linux_amd64.zip
100%[=================================================================>] 33.24M
90.3KB/s in 5m 28s

2020-08-14 17:01:06 (104 KB/s) - ‘terraform_0.13.0_linux_amd64.zip’ saved [34851622/34851622]
Unzip the downloaded package.
 @:~$ unzip terraform_0.13.0_linux_amd64.zip
Archive:
terraform_0.13.0_linux_amd64.zip
inflating: terraform
Move the terraform executable file to the following path. Check your Terraform version.
 @:~$ sudo mv terraform /usr/local/bin/
[sudo] password for :
@:~$ terraform -v
Terraform v0.13.0
You can see that these are commands that can be executed with terraform.
 @:~$ terraform
Usage: terraform [-version] [-help] <command> [args]

The available commands for execution are listed below.
The most common, useful commands are shown first, followed by
less common or more advanced commands. If you're just getting
started with Terraform, stick with the common commands. For the
other commands, please read the help and docs before usage.

Common commands:
apply Builds or changes infrastructure
console Interactive console for Terraform interpolations
destroy Destroy Terraform-managed infrastructure
env Workspace management
fmt Rewrites config files to canonical format
get Download and install modules for the configuration
graph Create a visual graph of Terraform resources
import Import existing infrastructure into Terraform
init Initialize a Terraform working directory
login Obtain and save credentials for a remote host
logout Remove locally-stored credentials for a remote host
output Read an output from a state file
plan Generate and show an execution plan
providers Prints a tree of the providers used in the configuration
refresh Update local state file against real resources
show Inspect Terraform state or plan
taint Manually mark a resource for recreation
untaint Manually unmark a resource as tainted
validate Validates the Terraform files
version Prints the Terraform version
workspace Workspace management

All other commands:
0.12upgrade Rewrites pre-0.12 module source code for v0.12
0.13upgrade Rewrites pre-0.13 module source code for v0.13
debug Debug output management (experimental)
force-unlock Manually unlock the terraform state
push Obsolete command for Terraform Enterprise legacy (v1)
state Advanced state management
Provision AWS EC2 instances using Terraform
This demo uses Terraform to launch a new AWS EC2 instance.
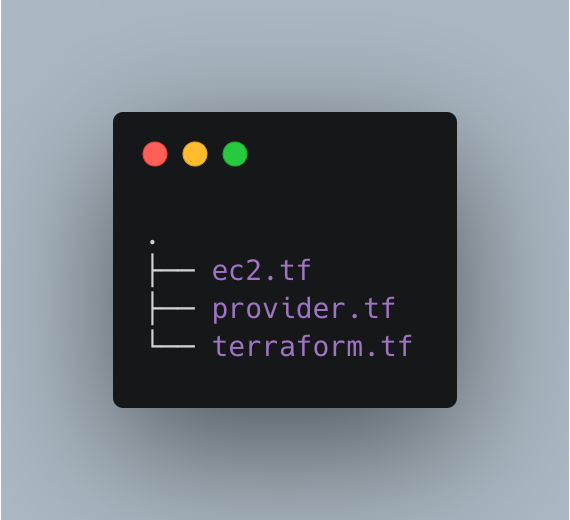
Create a working directory for this Terraform demo.
@:~$ mkdir terraform_demoChange directory and create a Terraform configuration file that defines the providers and resources for launching your AWS EC2 instance.
 @:~$ cd terraform_demo/
@:~/terraform_demo$ gedit awsec2.tf

provider "aws" {
access_key = "B5KG6Fe5GUKIATUF5UD"
secret_key = "R4gb65y56GBF6765ejYSJA4YtaZ+T6GY7H"
region = "us-west-2"
}

resource "aws_instance" "terraform_demo" {
ami = "ami-0a634ae95e11c6f91"
instance_type = "t2.micro"
}
Note: We changed the access key and secret key 😛, you should use your own key.
From the configuration above, you can see that we are referring to a provider like AWS. Within the provider, specify the AWS user credentials and the region in which the instance should be launched.
The resource details the AMI for Ubuntu (ami-0a634ae95e11c6f91) and states that the instance type must be t2.micro.
You don’t need to be an avid programmer to see how simple and readable the configuration file is.
Initializing terraform
Now, the first step is to initialize terraform.
 @:~/terraform_demo$ terraform init

Initializing the backend...

Initializing provider plugins...
- Using previously-installed hashicorp/aws v3.2.0

The following providers do not have any version constraints in configuration,
so the latest version was installed.

To prevent automatic upgrades to new major versions that may contain breaking
changes, we recommend adding version constraints in a required_providers block
in your configuration, with the constraint strings suggested below.

* hashicorp/aws: version = "~> 3.2.0"

Terraform has been successfully initialized!

You may now begin working with Terraform. Try running "terraform plan" to see
any changes that are required for your infrastructure. All Terraform commands
should now work.

If you ever set or change modules or backend configuration for Terraform,
rerun this command to reinitialize your working directory. If you forget, other
commands will detect it and remind you to do so if necessary.
terraform plan
Next comes the planning stage. An execution graph is created for creating and provisioning your infrastructure.
 @:~/terraform_demo$ terraform plan
Refreshing Terraform state in-memory prior to plan...
The refreshed state will be used to calculate this plan, but will not be
persisted to local or remote state storage.

------------------------------------------------------------------------

An execution plan has been generated and is shown below.
Resource actions are indicated with the following symbols:
+ create

Terraform will perform the following actions:

# aws_instance.terraform_demo will be created
+ resource "aws_instance" "terraform_demo" {
+ ami = "ami-0a634ae95e11c6f91"
+ arn = (known after apply)
+ associate_public_ip_address = (known after apply)
+ availability_zone = (known after apply)
+ cpu_core_count = (known after apply)
+ cpu_threads_per_core = (known after apply)
+ get_password_data = false
+ host_id = (known after apply)
+ id = (known after apply)
+ instance_state = (known after apply)
+ instance_type = "t2.micro"
+ ipv6_address_count = (known after apply)
+ ipv6_addresses = (known after apply)
+ key_name = (known after apply)
+ outpost_arn = (known after apply)
+ password_data = (known after apply)
+ placement_group = (known after apply)
+ primary_network_interface_id = (known after apply)
+ private_dns = (known after apply)
+ private_ip = (known after apply)
+ public_dns = (known after apply)
+ public_ip = (known after apply)
+ secondary_private_ips = (known after apply)
+ security_groups = (known after apply)
+ source_dest_check = true
+ subnet_id = (known after apply)
+ tenancy = (known after apply)
+ volume_tags = (known after apply)
+ vpc_security_group_ids = (known after apply)

+ ebs_block_device {
+ delete_on_termination = (known after apply)
+ device_name = (known after apply)
+ encrypted = (known after apply)
+ iops = (known after apply)
+ kms_key_id = (known after apply)
+ snapshot_id = (known after apply)
+ volume_id = (known after apply)
+ volume_size = (known after apply)
+ volume_type = (known after apply)
}

+ ephemeral_block_device {
+ device_name = (known after apply)
+ no_device = (known after apply)
+ virtual_name = (known after apply)
}

+ metadata_options {
+ http_endpoint = (known after apply)
+ http_put_response_hop_limit = (known after apply)
+ http_tokens = (known after apply)
}

+ network_interface {
+ delete_on_termination = (known after apply)
+ device_index = (known after apply)
+ network_interface_id = (known after apply)
}

+ root_block_device {
+ delete_on_termination = (known after apply)
+ device_name = (known after apply)
+ encrypted = (known after apply)
+ iops = (known after apply)
+ kms_key_id = (known after apply)
+ volume_id = (known after apply)
+ volume_size = (known after apply)
+ volume_type = (known after apply)
}
}

Plan: 1 to add, 0 to change, 0 to destroy.

------------------------------------------------------------------------

Note: You didn't specify an "-out" parameter to save this plan, so Terraform
can't guarantee that exactly these actions will be performed if
"terraform apply" is subsequently run.
Apply terraform
The apply stage runs the configuration file and launches the AWS EC2 instance. When you run the apply command, it asks, “Do you want to perform these actions?” You must type yes and press Enter.
 @:~/terraform_demo$ terraform apply

An execution plan has been generated and is shown below.
Resource actions are indicated with the following symbols:
+ create

Terraform will perform the following actions:

# aws_instance.terraform_demo will be created
+ resource "aws_instance" "terraform_demo" {
+ ami = "ami-0a634ae95e11c6f91"
+ arn = (known after apply)
+ associate_public_ip_address = (known after apply)
+ availability_zone = (known after apply)
+ cpu_core_count = (known after apply)
+ cpu_threads_per_core = (known after apply)
+ get_password_data = false
+ host_id = (known after apply)
+ id = (known after apply)
+ instance_state = (known after apply)
+ instance_type = "t2.micro"
+ ipv6_address_count = (known after apply)
+ ipv6_addresses = (known after apply)
+ key_name = (known after apply)
+ outpost_arn = (known after apply)
+ password_data = (known after apply)
+ placement_group = (known after apply)
+ primary_network_interface_id = (known after apply)
+ private_dns = (known after apply)
+ private_ip = (known after apply)
+ public_dns = (known after apply)
+ public_ip = (known after apply)
+ secondary_private_ips = (known after apply)
+ security_groups = (known after apply)
+ source_dest_check = true
+ subnet_id = (known after apply)
+ tenancy = (known after apply)
+ volume_tags = (known after apply)
+ vpc_security_group_ids = (known after apply)

+ ebs_block_device {
+ delete_on_termination = (known after apply)
+ device_name = (known after apply)
+ encrypted = (known after apply)
+ iops = (known after apply)
+ kms_key_id = (known after apply)
+ snapshot_id = (known after apply)
+ volume_id = (known after apply)
+ volume_size = (known after apply)
+ volume_type = (known after apply)
}

+ ephemeral_block_device {
+ device_name = (known after apply)
+ no_device = (known after apply)
+ virtual_name = (known after apply)
}

+ metadata_options {
+ http_endpoint = (known after apply)
+ http_put_response_hop_limit = (known after apply)
+ http_tokens = (known after apply)
}

+ network_interface {
+ delete_on_termination = (known after apply)
+ device_index = (known after apply)
+ network_interface_id = (known after apply)
}

+ root_block_device {
+ delete_on_termination = (known after apply)
+ device_name = (known after apply)
+ encrypted = (known after apply)
+ iops = (known after apply)
+ kms_key_id = (known after apply)
+ volume_id = (known after apply)
+ volume_size = (known after apply)
+ volume_type = (known after apply)
}
}

Plan: 1 to add, 0 to change, 0 to destroy.

Do you want to perform these actions?
Terraform will perform the actions described above.
Only 'yes' will be accepted to approve.

Enter a value: yes

aws_instance.terraform_demo: Creating...
aws_instance.terraform_demo: Still creating... [10s elapsed]
aws_instance.terraform_demo: Still creating... [20s elapsed]
aws_instance.terraform_demo: Still creating... [30s elapsed]
aws_instance.terraform_demo: Still creating... [40s elapsed]
aws_instance.terraform_demo: Creation complete after 44s [id=i-0eec33286ea4b0740]

Apply complete! Resources: 1 added, 0 changed, 0 destroyed.
If you go to your AWS EC2 dashboard, you will see that a new instance has been created with the instance ID listed at the end of the apply command.
You have successfully launched an AWS EC2 instance using Terraform.
Destruction of terraform
Finally, if you want to remove your infrastructure, you must run the destroy command.
 @:~/terraform_demo$ terraform destroy
aws_instance.terraform_demo: Refreshing state... [id=i-0eec33286ea4b0740]

An execution plan has been generated and is shown below.
Resource actions are indicated with the following symbols:
- destroy

Terraform will perform the following actions:

# aws_instance.terraform_demo will be destroyed
- resource "aws_instance" "terraform_demo" {
- ami = "ami-0a634ae95e11c6f91" -> null
- arn = "arn:aws:ec2:us-west-2:259212389929:instance/i-0eec33286ea4b0740" -> null
- associate_public_ip_address = true -> null
- availability_zone = "us-west-2c" -> null
- cpu_core_count = 1 -> null
- cpu_threads_per_core = 1 -> null
- disable_api_termination = false -> null
- ebs_optimized = false -> null
- get_password_data = false -> null
- hibernation = false -> null
- id = "i-0eec33286ea4b0740" -> null
- instance_state = "running" -> null
- instance_type = "t2.micro" -> null
- ipv6_address_count = 0 -> null
- ipv6_addresses = [] -> null
- monitoring = false -> null
- primary_network_interface_id = "eni-02a46f2802fd15634" -> null
- private_dns = "ip-172-31-13-160.us-west-2.compute.internal" -> null
- private_ip = "172.31.13.160" -> null
- public_dns = "ec2-34-221-77-94.us-west-2.compute.amazonaws.com" -> null
- public_ip = "34.221.77.94" -> null
- secondary_private_ips = [] -> null
- security_groups = [
- "default",
] -> null
- source_dest_check = true -> null
- subnet_id = "subnet-5551200c" -> null
- tags = {} -> null
- tenancy = "default" -> null
- volume_tags = {} -> null
- vpc_security_group_ids = [
- "sg-b5b480d1",
] -> null

- credit_specification {
- cpu_credits = "standard" -> null
}

- metadata_options {
- http_endpoint = "enabled" -> null
- http_put_response_hop_limit = 1 -> null
- http_tokens = "optional" -> null
}

- root_block_device {
- delete_on_termination = true -> null
- device_name = "/dev/sda1" -> null
- encrypted = false -> null
- iops = 100 -> null
- volume_id = "vol-0be2673afff6b1a86" -> null
- volume_size = 8 -> null
- volume_type = "gp2" -> null
}
}

Plan: 0 to add, 0 to change, 1 to destroy.

Do you really want to destroy all resources?
Terraform will destroy all your managed infrastructure, as shown above.
There is no undo. Only 'yes' will be accepted to confirm.

Enter a value: yes

aws_instance.terraform_demo: Destroying... [id=i-0eec33286ea4b0740]
aws_instance.terraform_demo: Still destroying... [id=i-0eec33286ea4b0740, 10s elapsed]
aws_instance.terraform_demo: Still destroying... [id=i-0eec33286ea4b0740, 20s elapsed]
aws_instance.terraform_demo: Still destroying... [id=i-0eec33286ea4b0740, 30s elapsed]
aws_instance.terraform_demo: Destruction complete after 34s

Destroy complete! Resources: 1 destroyed.
If you double check your EC2 dashboard, you’ll see that your instance has been terminated.
conclusion
I hope the above gives you some ideas to get started with Terraform. Try the example shown earlier.
Also check out these infrastructure automation software.
If you want to learn more, we recommend checking out the Learn DevOps with Terraform course.


![How to set up a Raspberry Pi web server in 2021 [Guide]](https://i0.wp.com/pcmanabu.com/wp-content/uploads/2019/10/web-server-02-309x198.png?w=1200&resize=1200,0&ssl=1)

")


 in Roblox")
")


")


")


")
