Vivo V9 ( ₹22,990 ) is the latest smartphone from Chinese smartphone giant Vivo, and it comes with a lot of new features not found in previous Vivo smartphones. The smartphone looks very beautiful and feels great in the hand. I can’t blame you if you already bought this phone just for the looks. If so, you’ll love this article that introduces you to the top 15 Vivo V9 features, tips, and tricks that will help you get the most out of your smartphone. So, take out your Vivo V9 and start learning how to use the following Vivo V9 features.
Vivo V9 features, tips and tricks
Since we’re going through a long list of Vivo V9 tips and tricks, we’ve divided the article into different sections so you can jump to the features you want to use.
Vivo V9 UI features
1. iPhone X-like navigation gestures
Anyone who has seen the Vivo V9 knows that this smartphone is heavily inspired by the iPhone X. It features a notch on the front and a vertical camera arrangement on the back, similar to the iPhone X design. The Vivo V9 not only looks but behaves like the iPhone X, so you can enable gesture navigation, which replaces Android navigation buttons with a new iPhone X-like gesture interface. To enable gesture navigation, go to Settings -> System navigation -> Navigation gestures and enable it .

When you do this, Vivo V9 will show you a demo on how to use the navigation gestures. When you run the demo, navigation gestures are enabled. You can now see that the Android navigation keys have been replaced with three new bars. Swipe the left bar to launch Control Center, swipe the center bar to go back home, swipe the right bar to go back one page, swipe and hold the center bar to bring up the Recent apps menu can be started.
2. Zoom by tilt
One of the unique features of Vivo V9 is the ability to zoom images with just one finger on your smartphone. However, this feature is not turned on by default and must be enabled manually to use it. To enable this feature, go to Settings -> Smart Motion -> Tilt to zoom photos and enable it.

With this option enabled, you can zoom in or out on a photo by simply placing one finger on the photo and tilting your phone forward or backward. Tilt your phone towards you to enlarge the image and vice versa . This is a very useful feature for users who often use their smartphones with one hand.
3. Custom mapped keys
My favorite new feature on the Vivo V9 is the ability to map your smartphone’s keys to different actions (like launching an app). To custom map your Vivo V9 keys, go to Settings -> Smart Click and choose the app you want to launch when you press the key . Please note that currently only the volume down button can be mapped.

If you want to select an app other than the system apps provided by default, tap the Enable app option and select the app you want to launch . The last thing to remember here is the fact that this feature only works on the lock screen, and even when no media is playing on your phone.
:quality(50)/cloudfront-ap-northeast-1.images.arcpublishing.com/sankei/5UBJC7VMNNPAHF7V3LVMEHUE5I.jpg)
4. Raise to Wake
The last UI trick we’ll show you is the “Raise to Wake” feature that wakes up the Vivo V9 when you pick up your phone. This feature works in conjunction with Vivo V9’s new face unlock feature to unlock your device without you having to do anything. This is also a feature introduced directly from iPhone X.


Vivo V9 calling tricks
1. Custom call recording
Call recording is a feature that many companies like OnePlus and Xiaomi include in their smartphones. This feature is very useful and comes with Vivo V9 along with some additional features. In addition to enabling call recording for all calls or numbers that are not saved on your Vivo V9, you can also specify the contacts whose calls you want to record .
This is a very useful feature for me, as I like to record calls with colleagues so I don’t miss any of the main points of the discussion. However, I don’t record calls from friends and family because I don’t want to fill up my phone’s storage. Vivo V9 allows you to select custom contacts whose calls you want to record. To use this feature, go to Settings -> Phone -> Recording Settings and tap Automatically record custom calls . Next, tap the Custom button and select the number you want to be able to record calls from.

2. Smart low volume switching
Another feature that comes with the Vivo V9 that I like is the “smart low volume” that automatically lowers the ringer volume as soon as you lift the phone and your face is detected. This is very useful when deciding whether to answer a call. To enable this feature, go to Settings -> Smart Motion -> Smart Low Volume and enable it .

3. Built-in phone number identifier
This feature is very useful if you tend to receive a large number of calls from unknown numbers. Vivo V9 has a built-in phone number identifier that works exactly like Truecaller and identifies the identity of the caller .

To enable it, go to Settings -> Phone -> Online unknown number recognition and turn it on .
Vivo V9 camera features and tricks
1. Live photo
Vivo mobile phones are widely known as camera phones as they can take some really great photos. It’s not just the camera hardware that Vivo uses, but also the software. Vivo’s camera app is great and has a lot of features that most smartphones don’t have. One of these features is Live Photo, which allows users to record a small video that can be viewed by touching and holding a photo. This is also one of the features that Vivo has borrowed from the iPhone. To use Live Photo, launch the Camera app and tap the Live Photo icon (marked in the image below) .

2. Control your camera with your voice
One of the best features of the Vivo V9 camera is that you can control it using just your voice. This feature is very useful in situations where you cannot physically press the shutter button. To enable this feature, first launch the Camera app and click the settings gear icon in the top right. Now, tap “Audio” on the third line from the top. Just say “cheese” and the camera will automatically take a photo.
3. Portrait mode
One of the features that made the iPhone camera popular is portrait photography. Ever since Portrait mode was introduced on the iPhone 7 Plus, most Android manufacturers have started including Portrait mode on their smartphones, and the Vivo V9 is no exception. What is different is the fact that the Vivo V9 can take portraits from both the rear and front cameras . To take a portrait photo using your camera, just tap the portrait mode icon before taking the photo.

4.AR sticker
The Vivo V9 also comes with the AR sticker feature, which has become very popular in recent months. To access AR stickers, swipe your camera’s viewfinder from right to left until you see “AR Stickers” mode . To change your AR sticker, first tap the smiley icon and select the AR sticker you want to use. Please note that stickers will be downloaded before use. So if you don’t have a mobile data plan, download stickers only when you’re connected to WiFi.

Other Vivo V9 tricks
1. Face recognition and app lock
As you may know, the Vivo V9 also comes with an all-new face unlock feature that allows users to unlock their smartphone with just their face. But did you know that you can also use facial unlock data to password protect your apps? Well, to set that up, you first need to configure facial unlock. To do this, go to Settings -> Fingerprint Face & Password -> Face.

Now, tap Add Face Data and follow the instructions to add your face to your phone . Please note that Face Unlock on Vivo V9 is not as secure as FaceID on iPhone X, so it cannot be used for things like payments and banking. However, the Vivo V9 allows you to use the facial recognition feature to secure your apps.

To lock apps using the facial recognition feature, tap the Privacy & App Encryption option in the Fingerprint, Face, Password menu . If you have already added Face Data, you will see an option to Enable Face Recognition. Tap the “On” button to enable it.
2. Blur specific apps in “Recent apps”
The Recent Apps menu shows mini previews of recently used apps. If someone is feeling cheeky, they can extract your personal information from the Recents app menu. Thankfully, Vivo V9 comes with a feature that allows you to blur the cards in the recent apps menu to prevent data theft from happening .

To enable this feature, go to Settings -> More Settings -> Recent Apps and enable the Blurred option . Once that’s done, you can select the apps you want to blur in the Recent menu to protect your data.

3. Flashlight notification
Another useful feature is flashlight notifications . As the name suggests, your flashlight will turn on every time you receive a notification . This feature is useful when you don’t want to miss any notifications.

To enable this feature, go to Settings -> Advanced Settings -> Flashlight Notifications and enable it.
4. Split screen dedicated to messaging
One of the best features that the Vivo V9 brings is a dedicated split-screen mode for messaging. This feature essentially allows you to seamlessly convert your full-screen app to split-screen mode whenever you receive a message and tap on the notification .
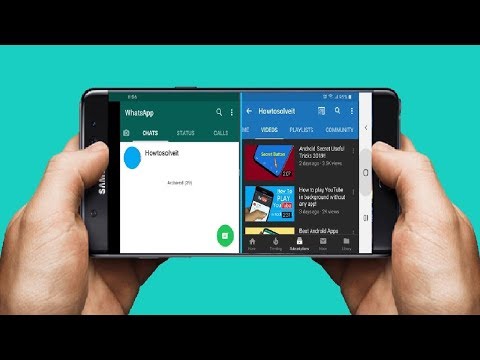
Basically what happens is that you receive a notification in a floating bubble (think Facebook Messenger), and when you tap the bubble, the messaging app opens in split-screen mode with the app you’re already using. To enable this feature, go to Settings -> Smart Split -> Message Screen Split and enable it . Here you can also select which apps you want to enable smart split screen mode for.
SEE ALSO: Vivo X21 UD with under-display fingerprint scanner to launch in India on May 29
Use your Vivo V9 like a pro with these amazing tricks
I hope you found these tips and tricks useful and learned something new. Vivo V9 comes with many hidden features, but these are just some of the most important ones. If you liked this article and want to know more such hidden features of Vivo V9, let us know by writing in the comment section below.


![How to set up a Raspberry Pi web server in 2021 [Guide]](https://i0.wp.com/pcmanabu.com/wp-content/uploads/2019/10/web-server-02-309x198.png?w=1200&resize=1200,0&ssl=1)

")


 in Roblox")
")


")


")


")
